
Conditional Logic
Control how users move through your form with conditional logic and branching flows
Surface Forms supports conditional logic to control how users move through your form. You can decide which step comes next, when to mark a response as completed, or when to stop users from continuing.
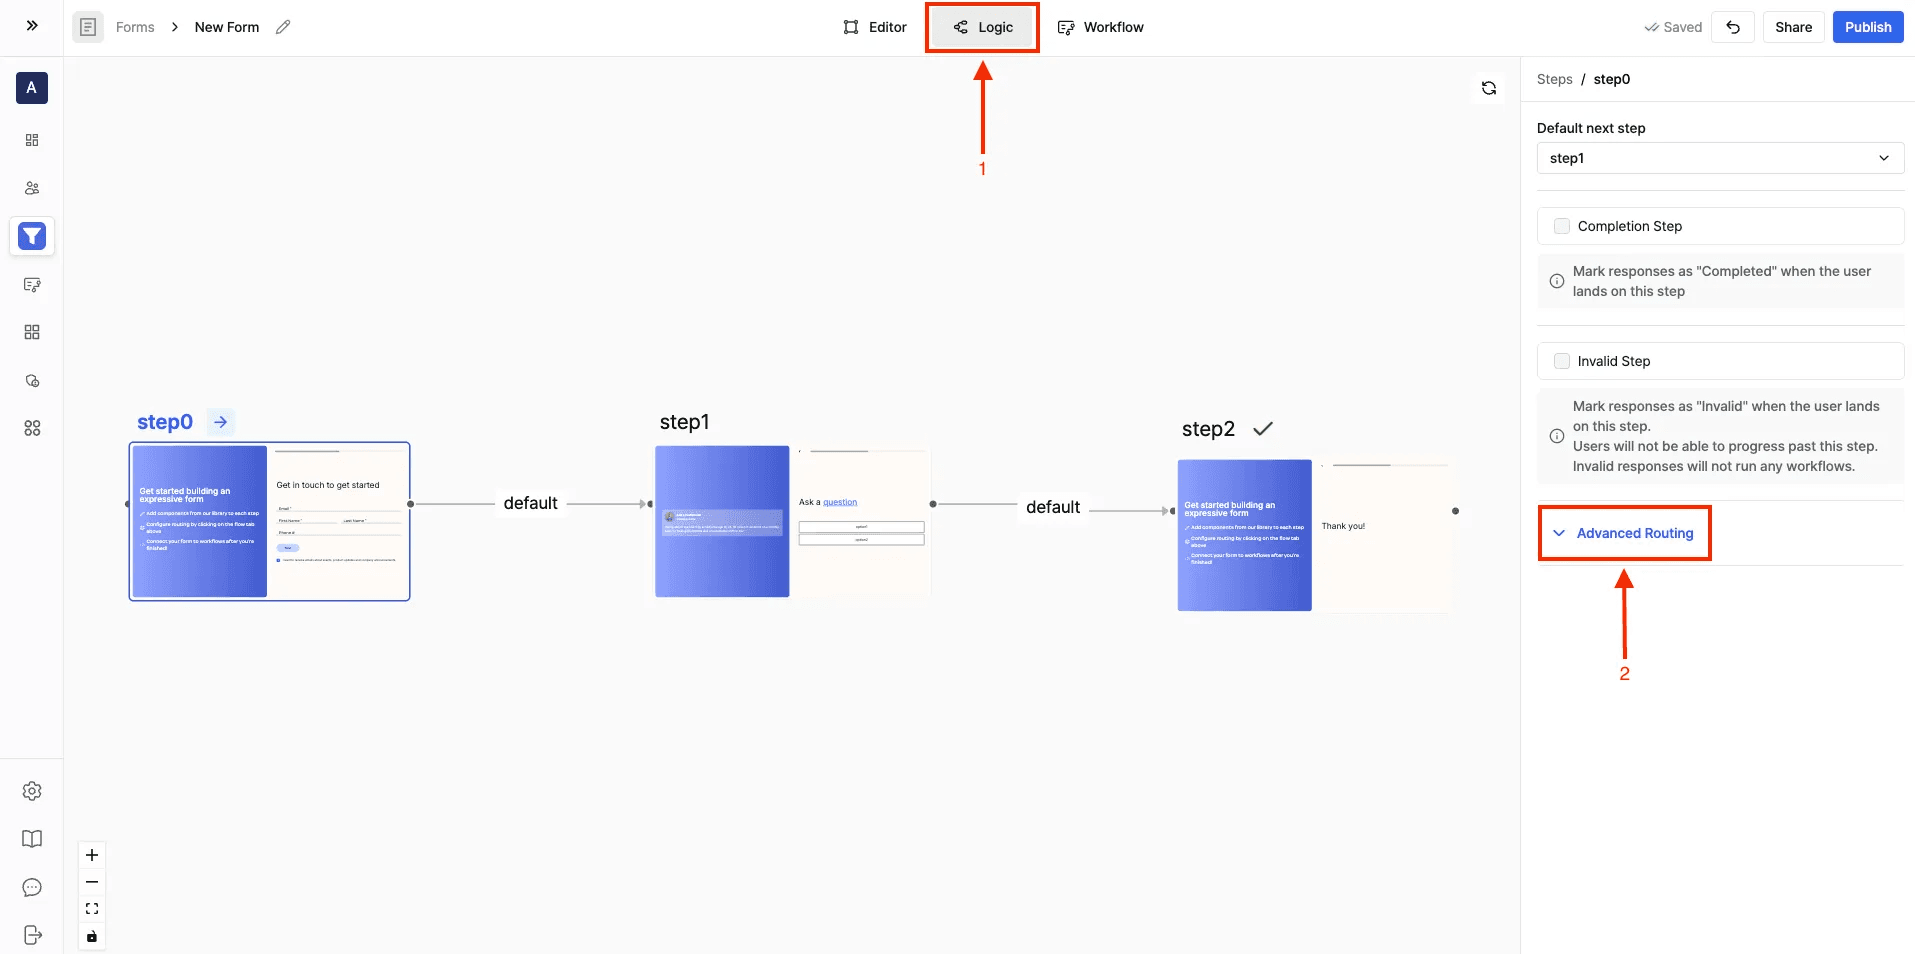
Open the Logic Tab
- Navigate to your form in the Surface editor.
- At the top, click on the Logic tab.
- Select the step you want to configure.
1. Change the Default Next Step
By default, each step flows to the next one in order. But you can change this:
- Select a step (e.g., step0).
- In the right-hand panel, open the Default next step dropdown.
- Choose which step should follow.
This allows you to create branching flows, sending users to different paths depending on how your form is structured.
2. Mark a Step as a Completion Step
A Completion Step ends the form once the user reaches it.
- Toggle on Completion Step in the right-hand panel.
- When a user lands on this step, their response is marked as Completed, and workflows tied to completions will run.
Use this for your final Thank You or Confirmation screens.
3. Mark a Step as an Invalid Step
An Invalid Step blocks the user from progressing further.
- Toggle on Invalid Step in the right-hand panel.
- When a user lands here, their response is marked as Invalid.
- Invalid responses will not trigger workflows and the user cannot move forward.
This is useful for:
- Filtering out unqualified leads
- Handling incorrect inputs
- Blocking progression when conditions aren't met
Advanced Routing (Routing Rules)
Advanced Routing lets you control how respondents move through your form based on their answers. Instead of a fixed linear flow, you can add logic to skip, branch, or redirect steps dynamically.
What you can do with Advanced Routing
- Add Conditions – Define rules that check user inputs (e.g., email, company size, budget, etc.).
- Use Form Response Data – Conditions can be applied directly on responses collected in previous steps.
- Customize User Paths – Send users to different steps based on their answers.
Example
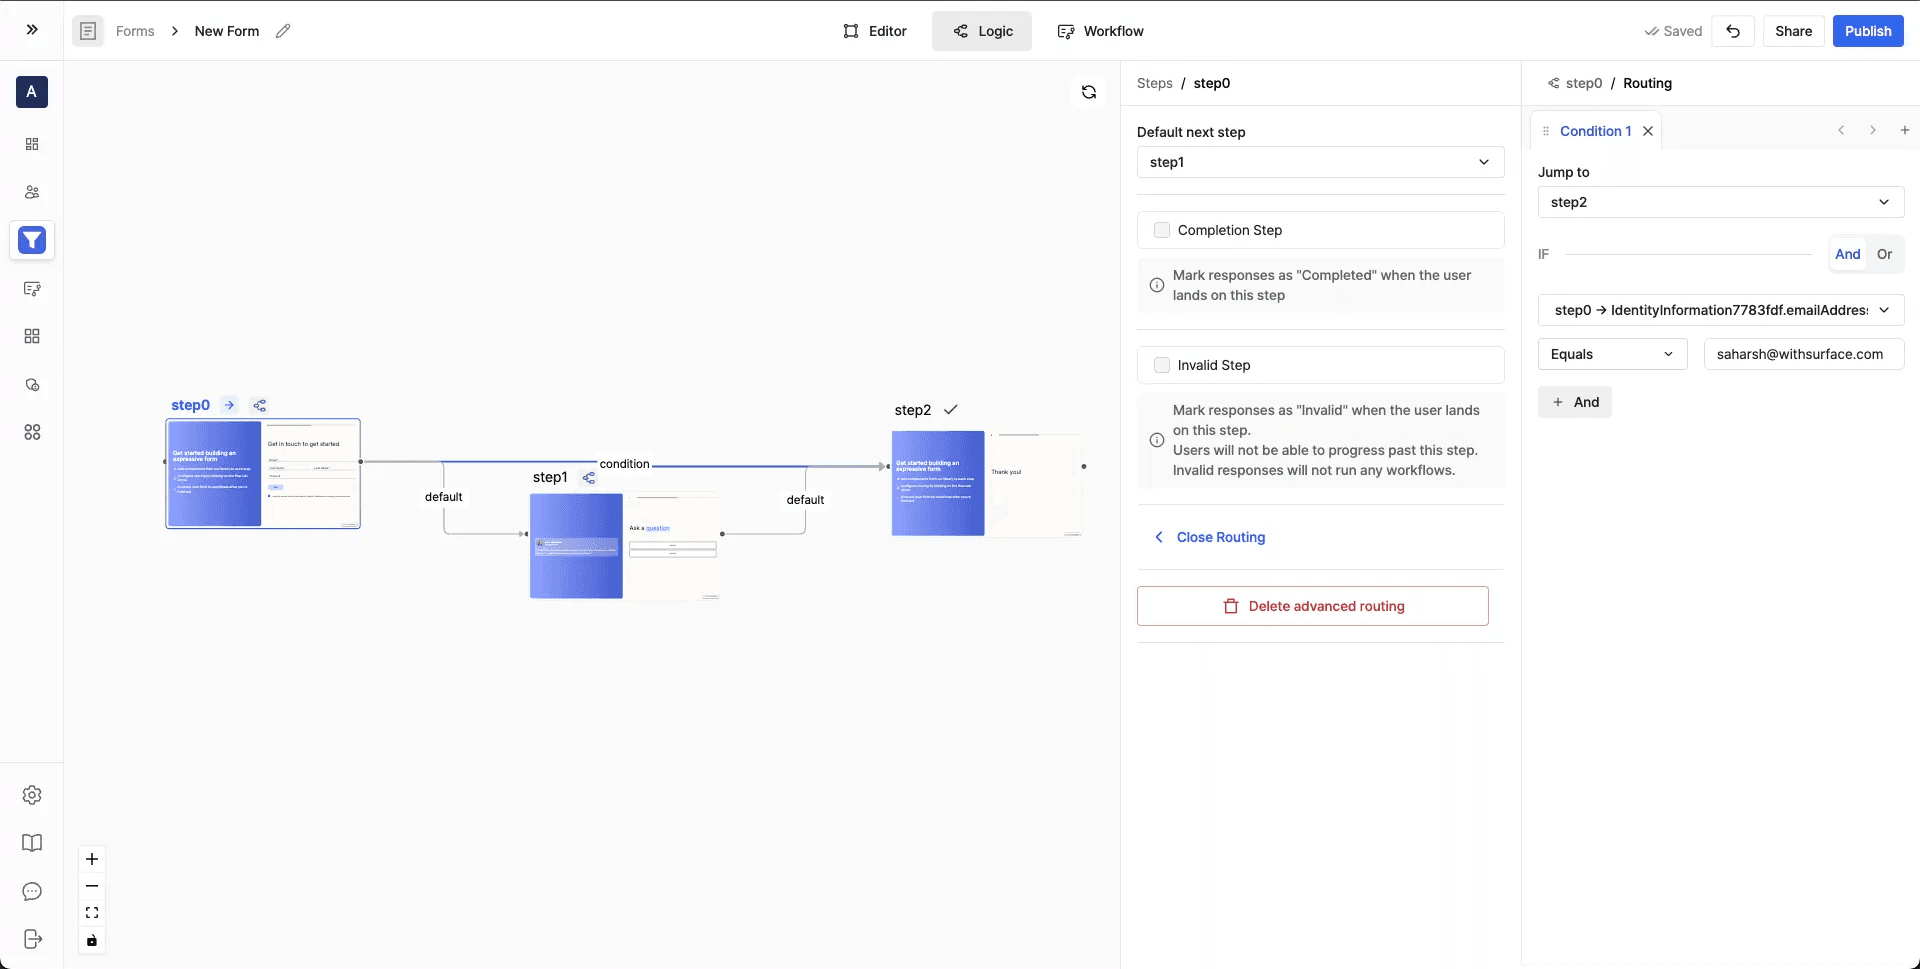
Suppose you want to skip certain users directly to the end of the form based on their email address:
- Condition: If the email entered in Step 0 equals saharsh@withsurface.com
- Action: Jump to Step 2 (Thank you step)
- Else: Default path continues to Step 1
This way, you can create personalized form experiences depending on who is filling out the form.
You can combine multiple conditions using AND / OR logic to create powerful branching flows.