Prerequisites
- Calendly API token: Create a Personal Access Token in your Calendly developer settings
- Organization URI or User URI: From your Calendly account (required for the API)
- Event type URI: The URI of the event type you want to check (e.g., “30-min discovery call”)
Add the Webhook Block
- In your event-triggered campaign (from Step 3), add a Send and receive data block after each Delay and before each follow-up email (except the first email)
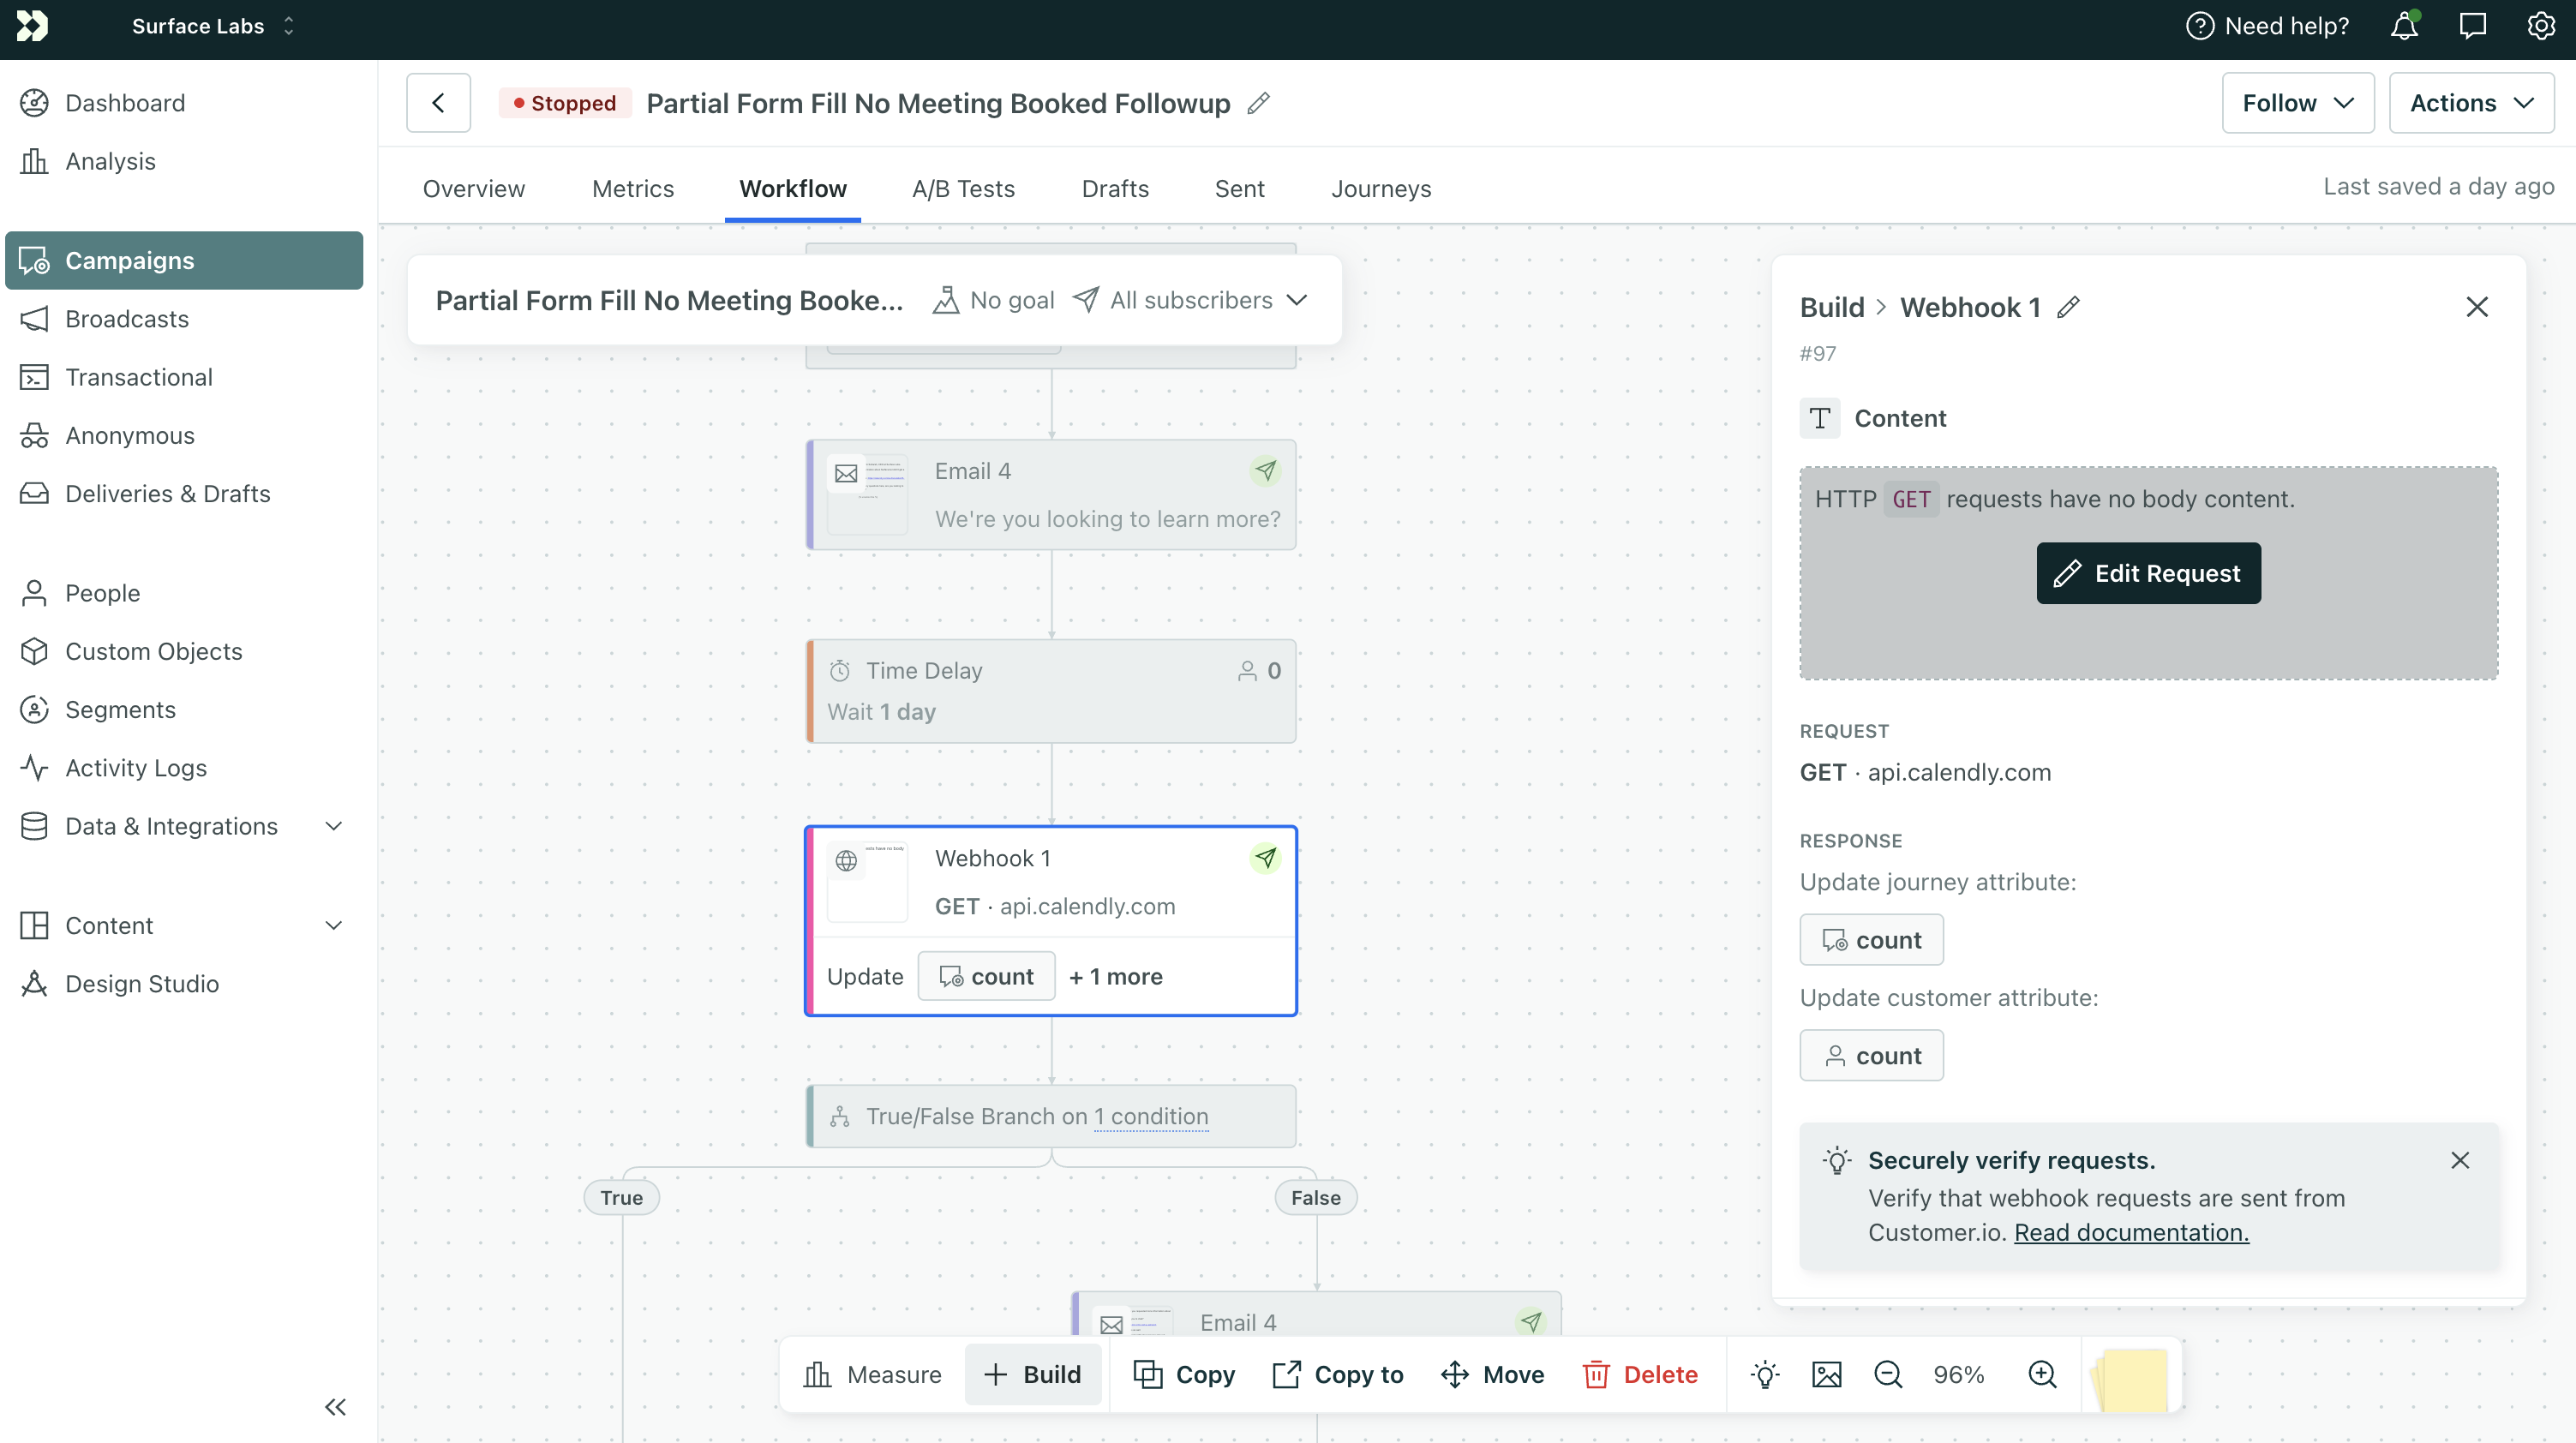
- Click the
Edit Requestbutton to configure the request.
Configure the Calendly API Request
Call the Calendly List Scheduled Events endpoint withinvitee_email to check if the lead has any scheduled meetings.
Request Setup
| Setting | Value |
|---|---|
| Method | GET |
| URL | See the sample URL below |
| Headers | Authorization: Bearer YOUR_CALENDLY_TOKEN |
YOUR_ORG_ID with your Calendly organization ID):
invitee_email parameter filters events by the lead’s email. If the response collection has items, the meeting is booked. If it’s empty, it’s not.
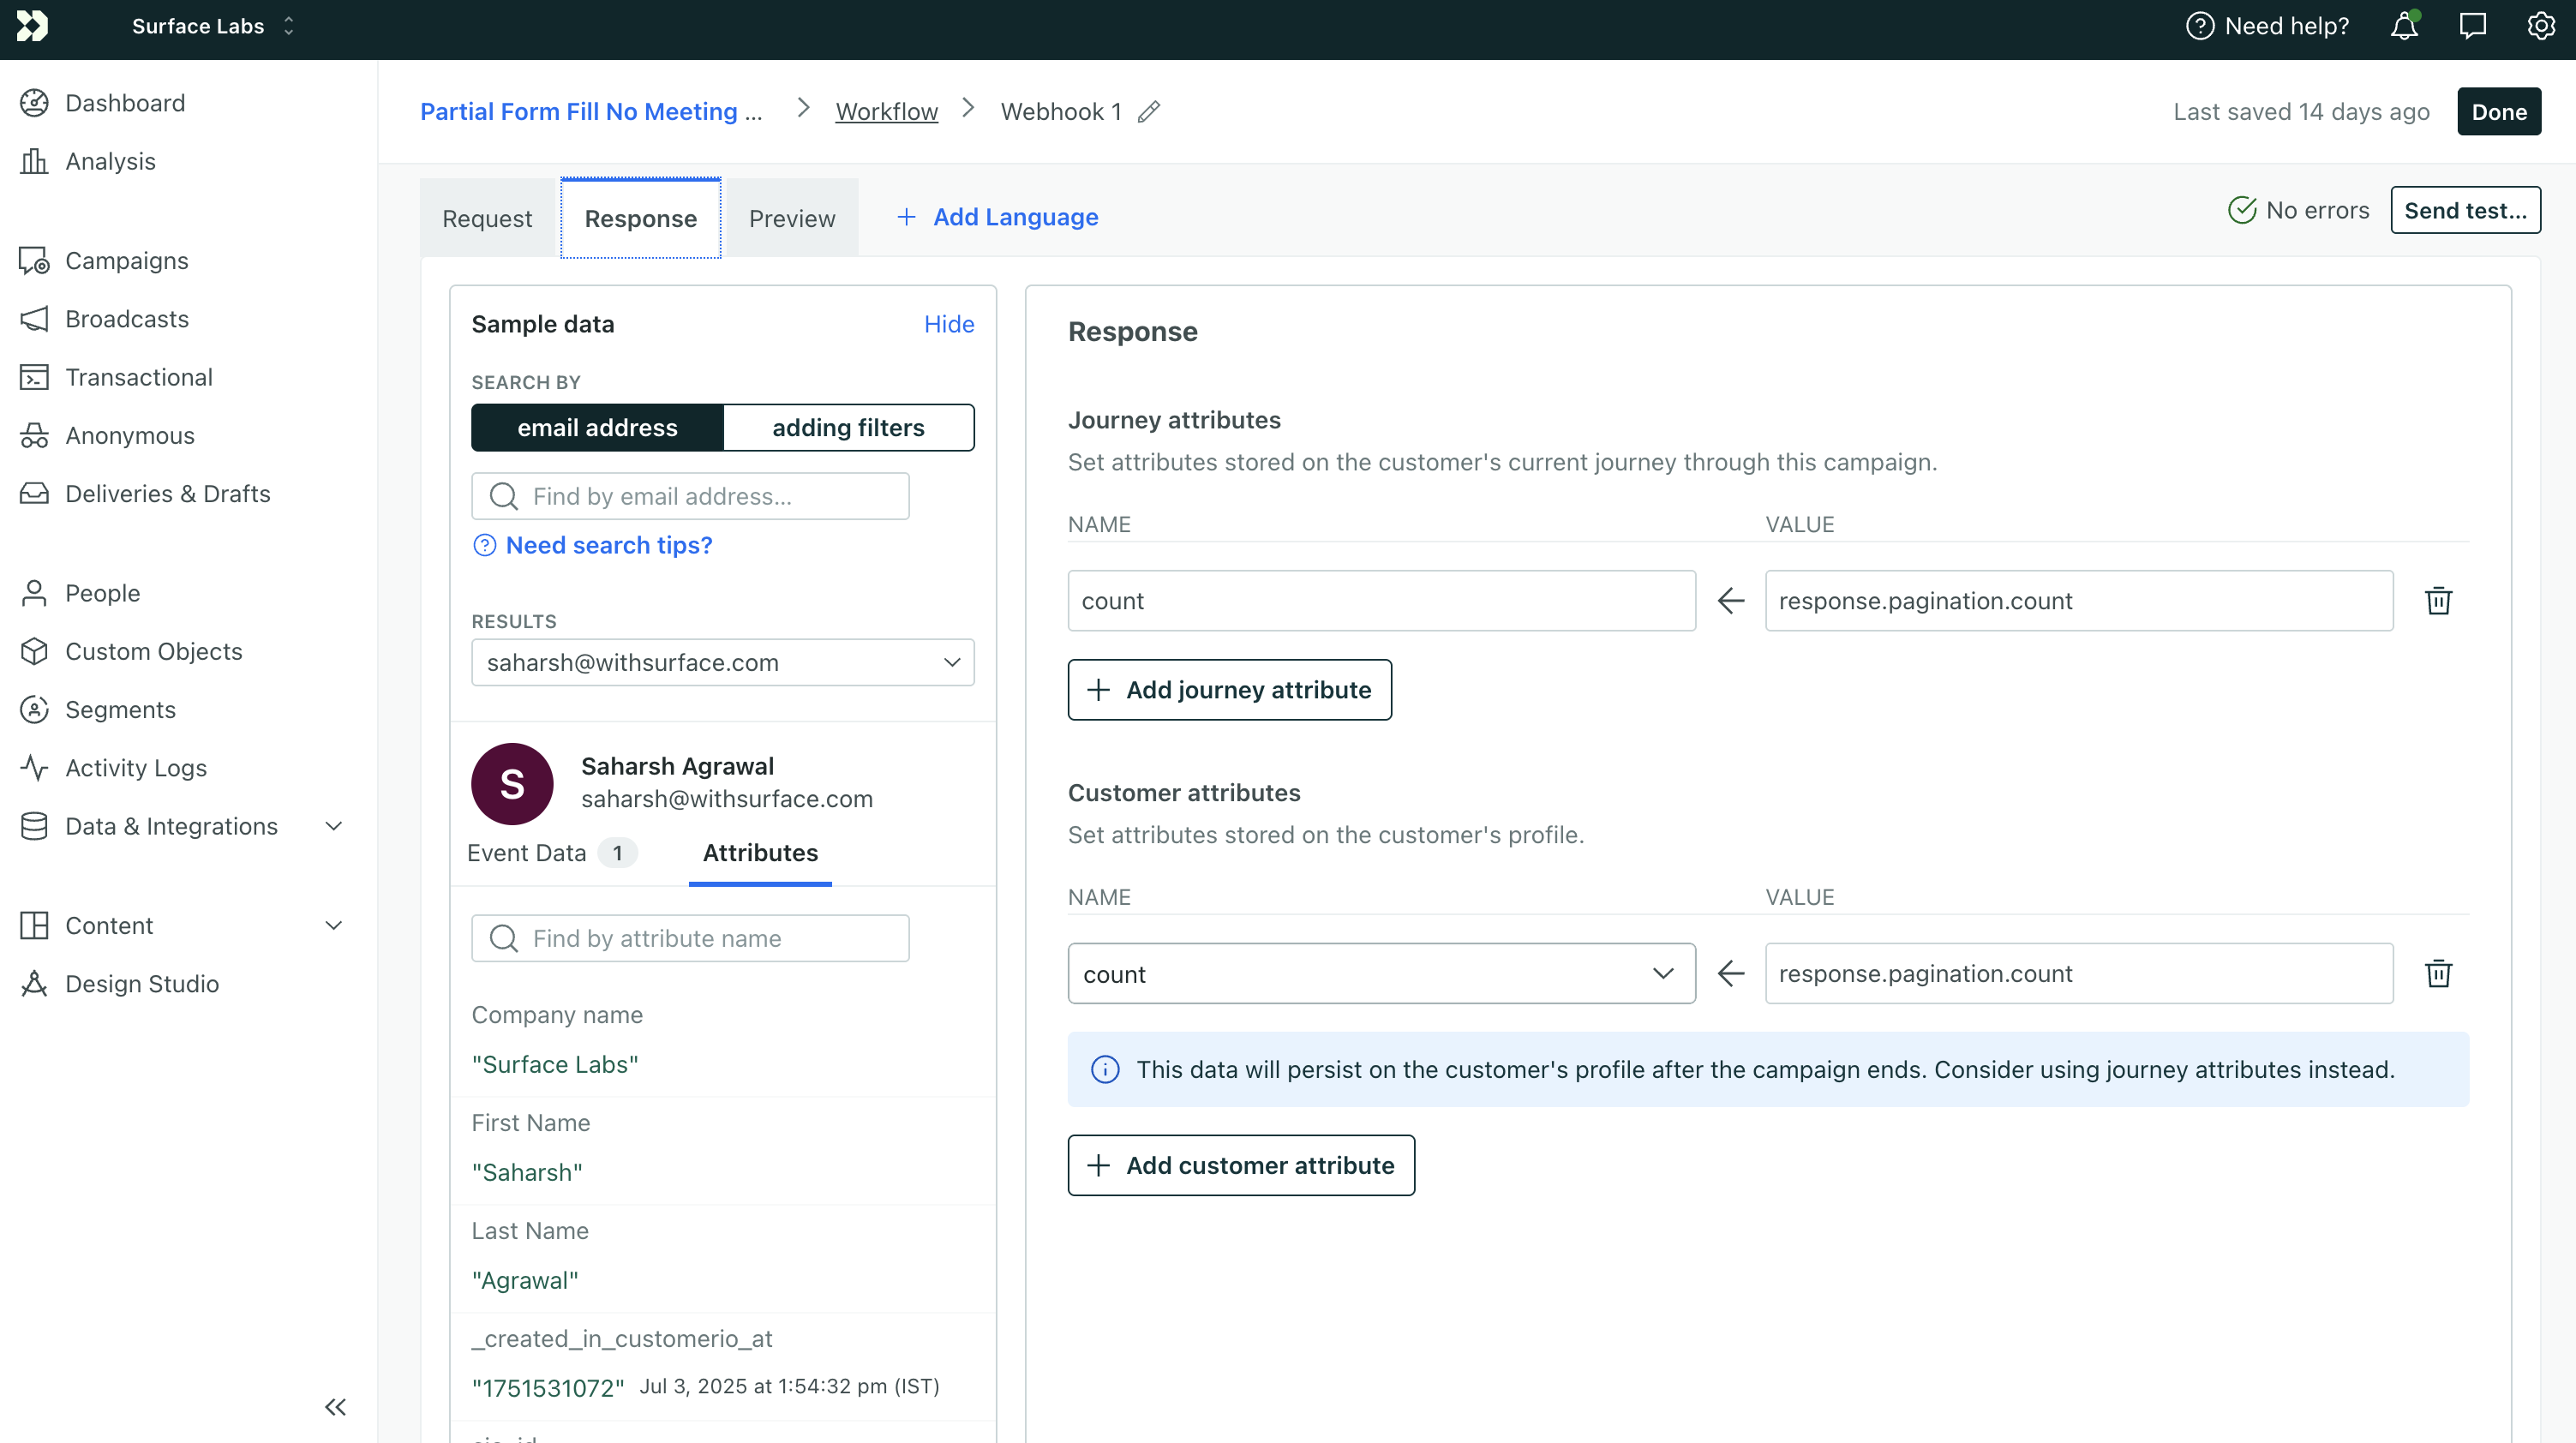
Response Configuration
Go to the Response tab in the webhook settings and add the following so you can use the Calendly API’s pagination count in your branch logic: Journey attributes| Name | Value |
|---|---|
count | response.pagination.count |
| Name | Value |
|---|---|
count | response.pagination.count |
count is greater than 0, the lead has booked a meeting.
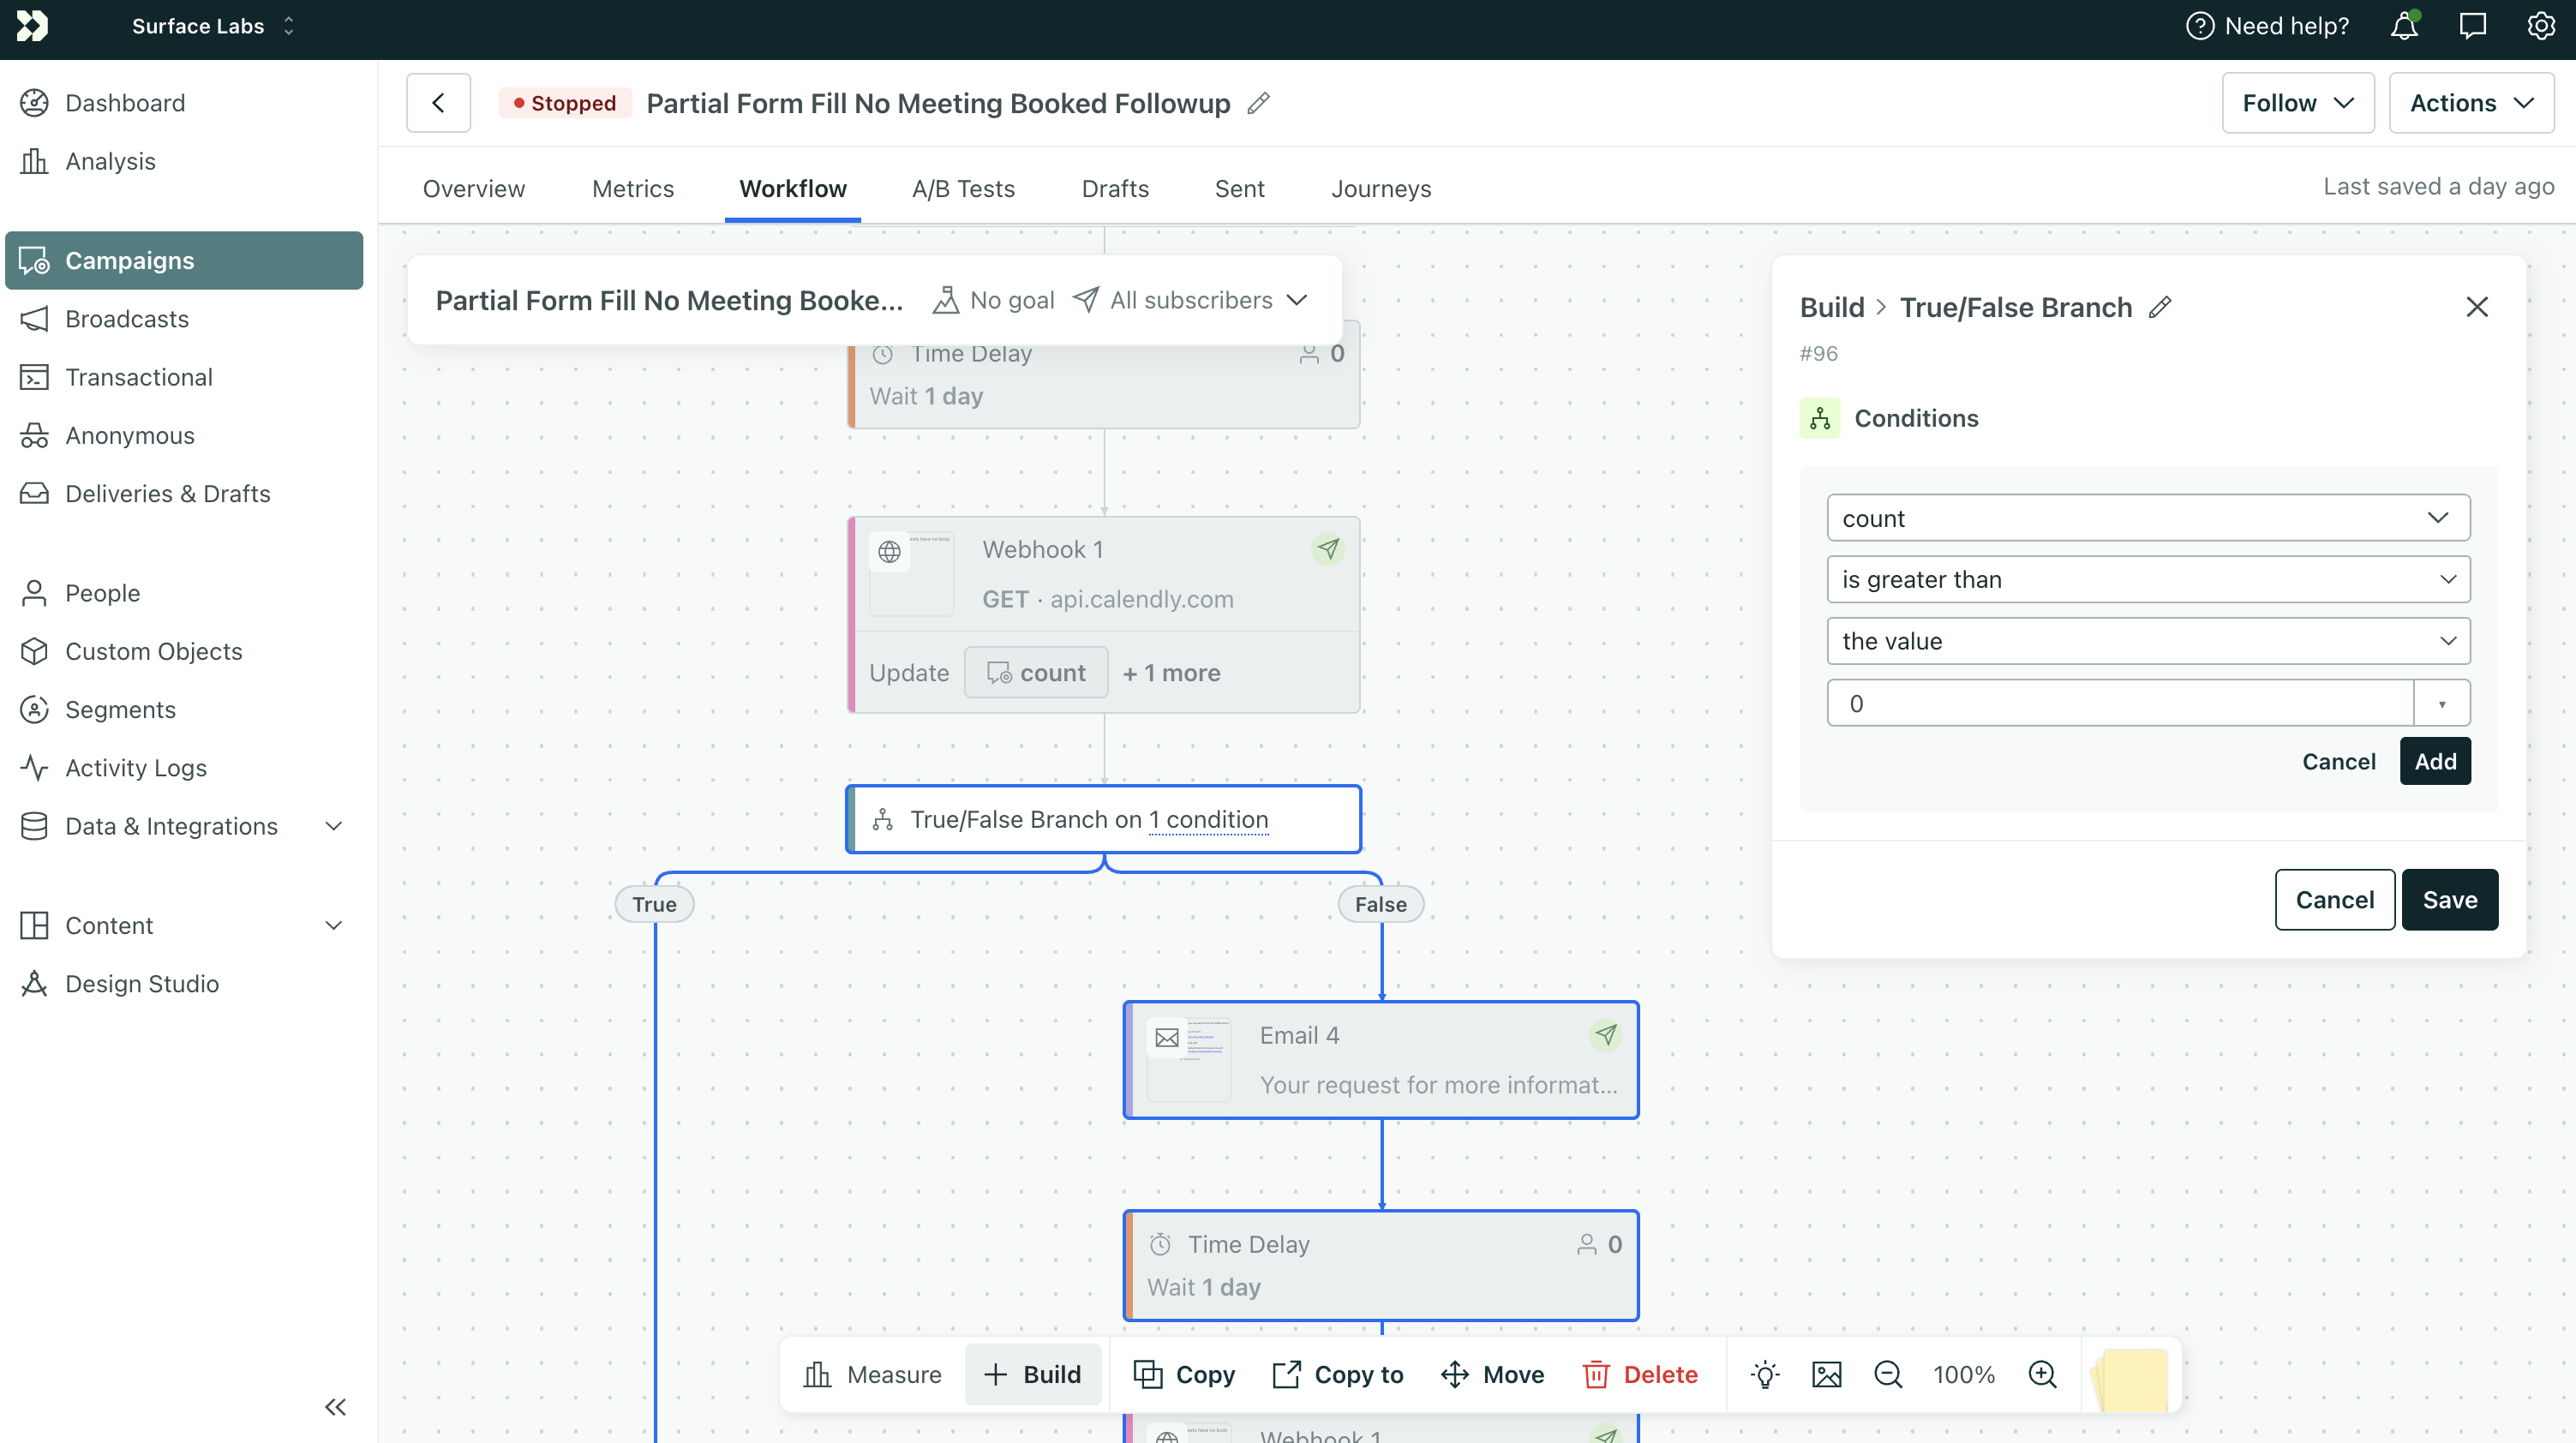
Configure the True/False Branch
After the webhook returns a response, add a True/False Branch to decide whether to exit or continue:- Add a True/False Branch block after the webhook
- Click Add condition
- Pick Custom attribute →
count - Set the condition to is greater than → the value →
0 - Click Add and Save
Place the Check in Your Workflow
The flow for each “cycle” after the first email should be:Summary
You now have:- Two webhook-triggered campaigns that create/update people and send events (partial + completed)
- A Surface workflow that sends form data to Customer.io
- Two event-triggered email campaigns (partial and completed)
- Calendly meeting checks before each follow-up—exiting the campaign when a meeting is booked