In this step, you’ll create two webhook-triggered campaigns in Customer.io—one for Dropped Off (partial) submissions and one for Form Submission (completed). Each campaign has its own webhook URL, so Surface sends to the right URL based on the trigger path. No need to pass submission_type in the payload.
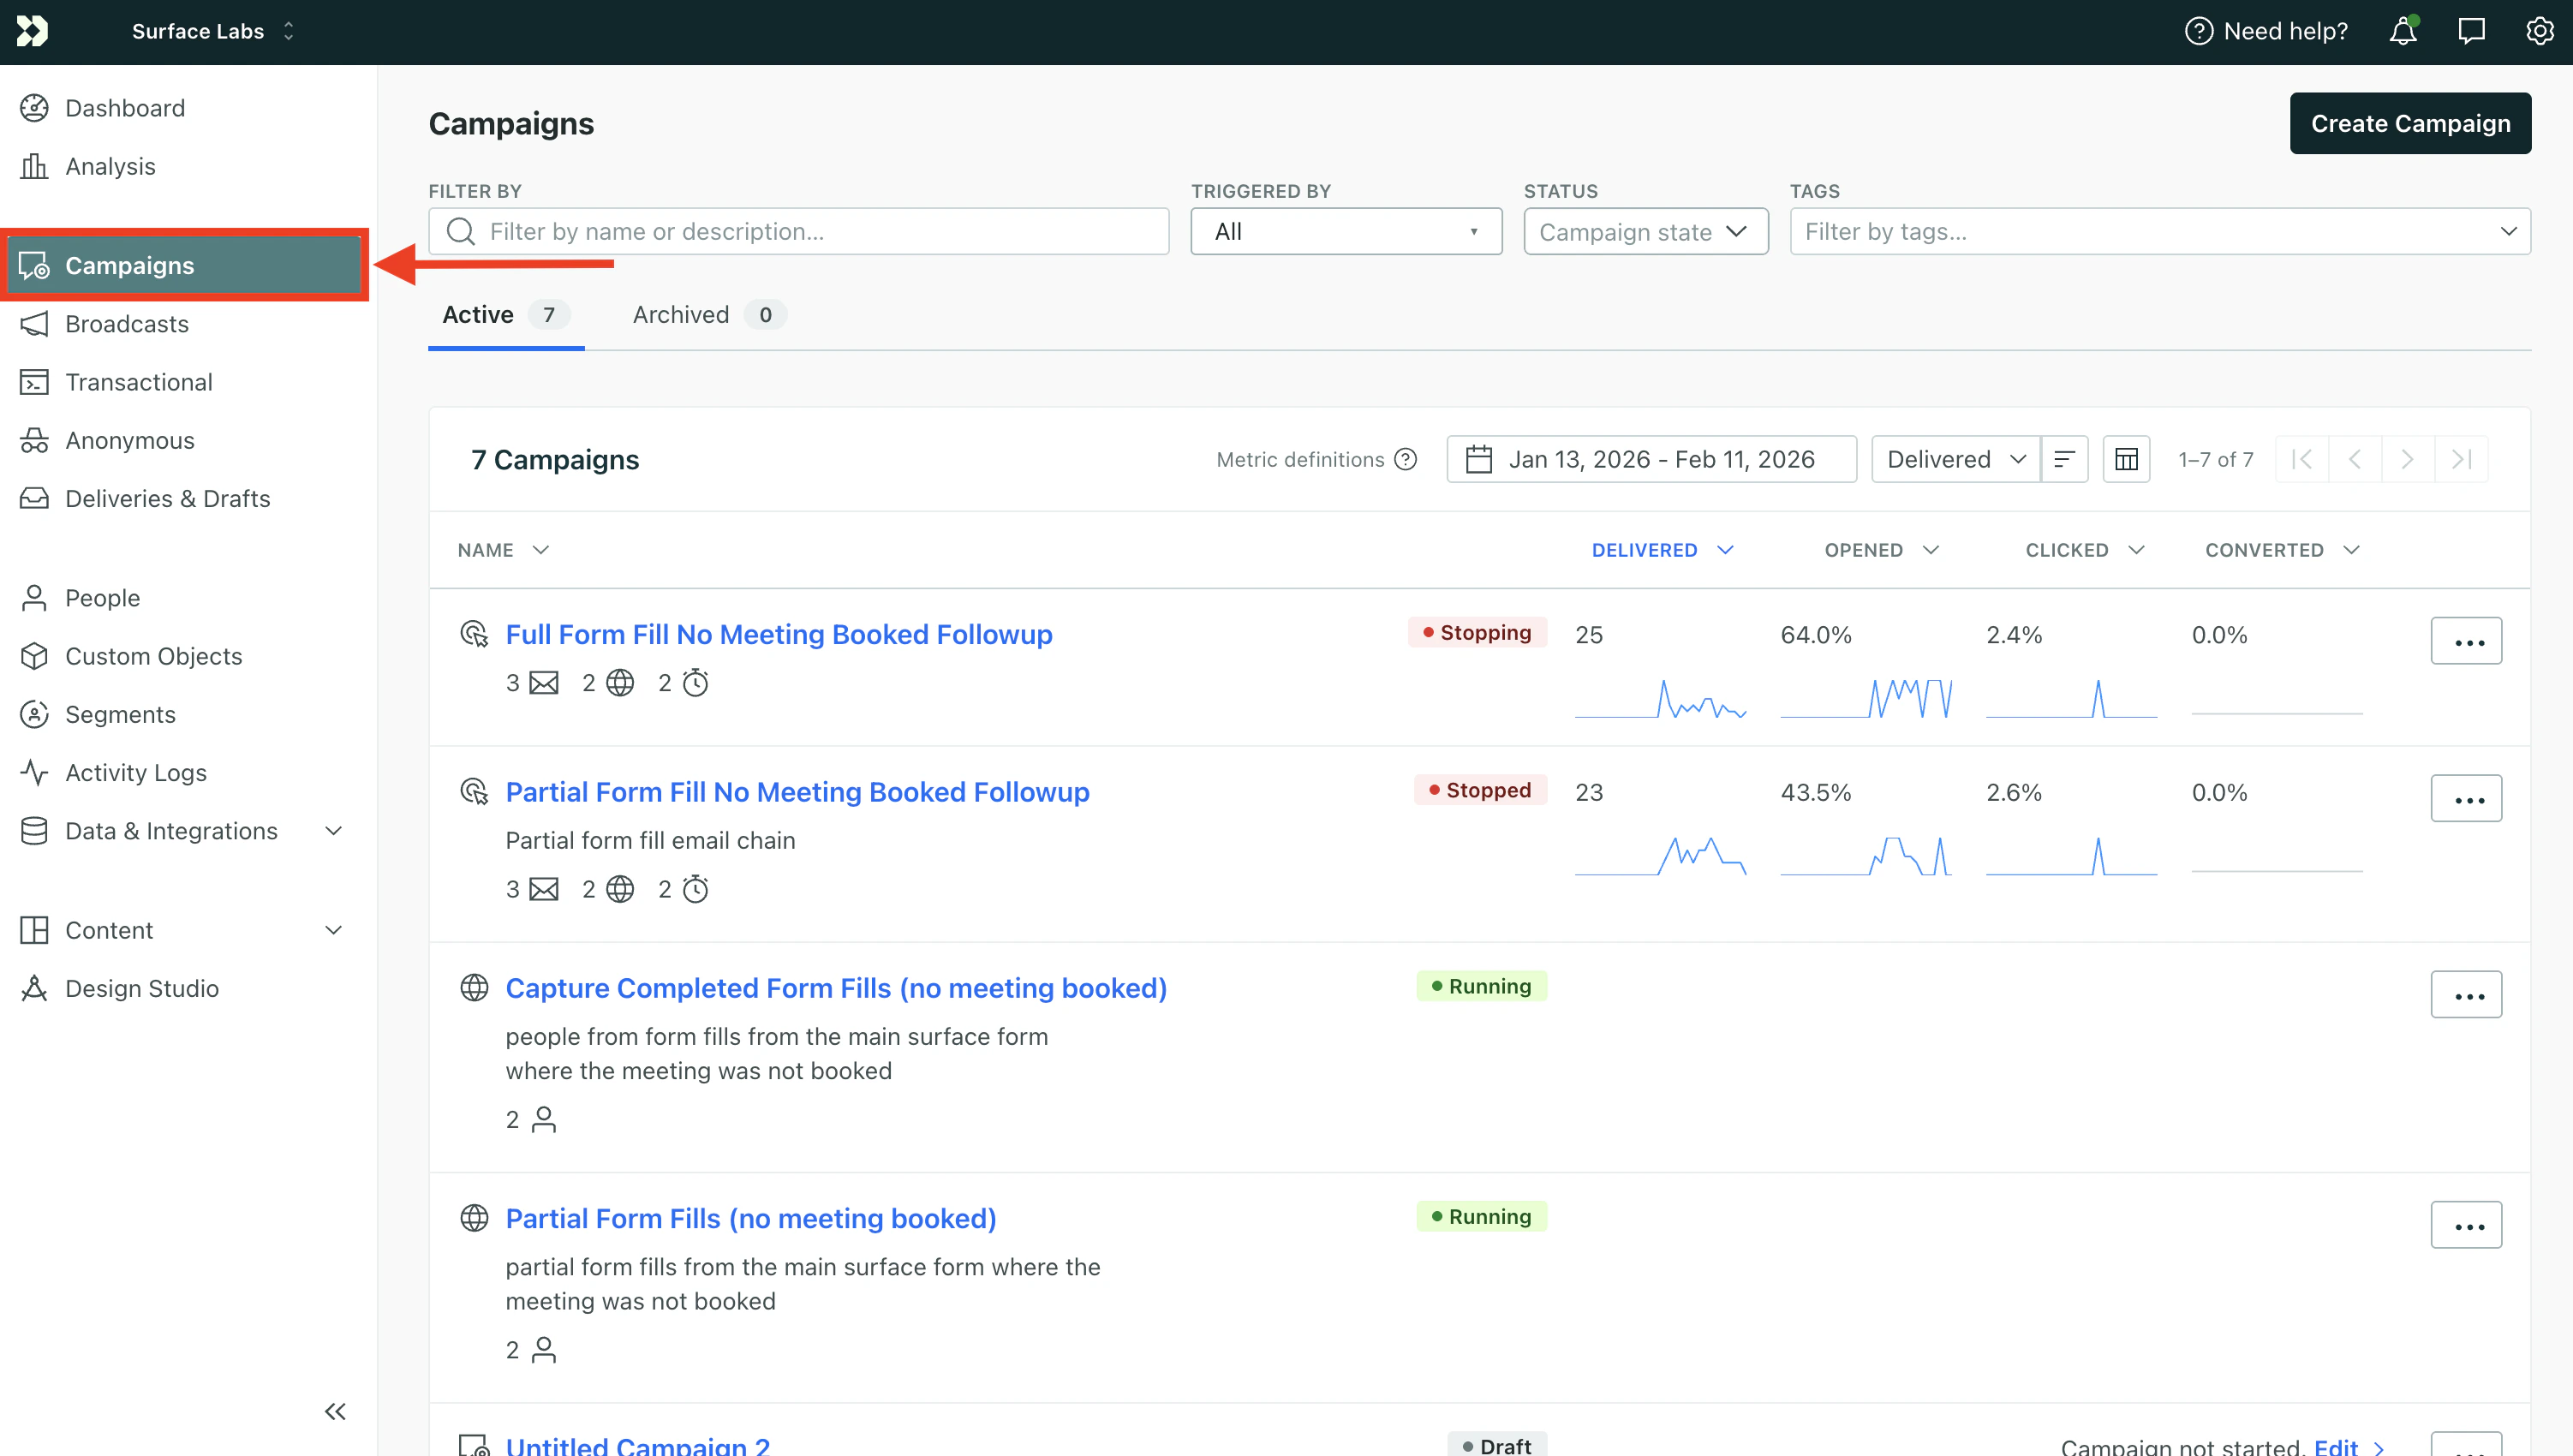
Create the First Webhook Campaign (Partial / Dropped Off)
- In Customer.io, go to Campaigns and click Create Campaign
- Click Webhook as the trigger type
- Copy the Webhook URL—you’ll use this for the Dropped Off path in Step 2
- Click Save & Next
Set Up the Workflow
Add two actions to this campaign:
- Create or Update Person — so the lead exists in Customer.io
- Send Event — so your partial-submission email campaign can start
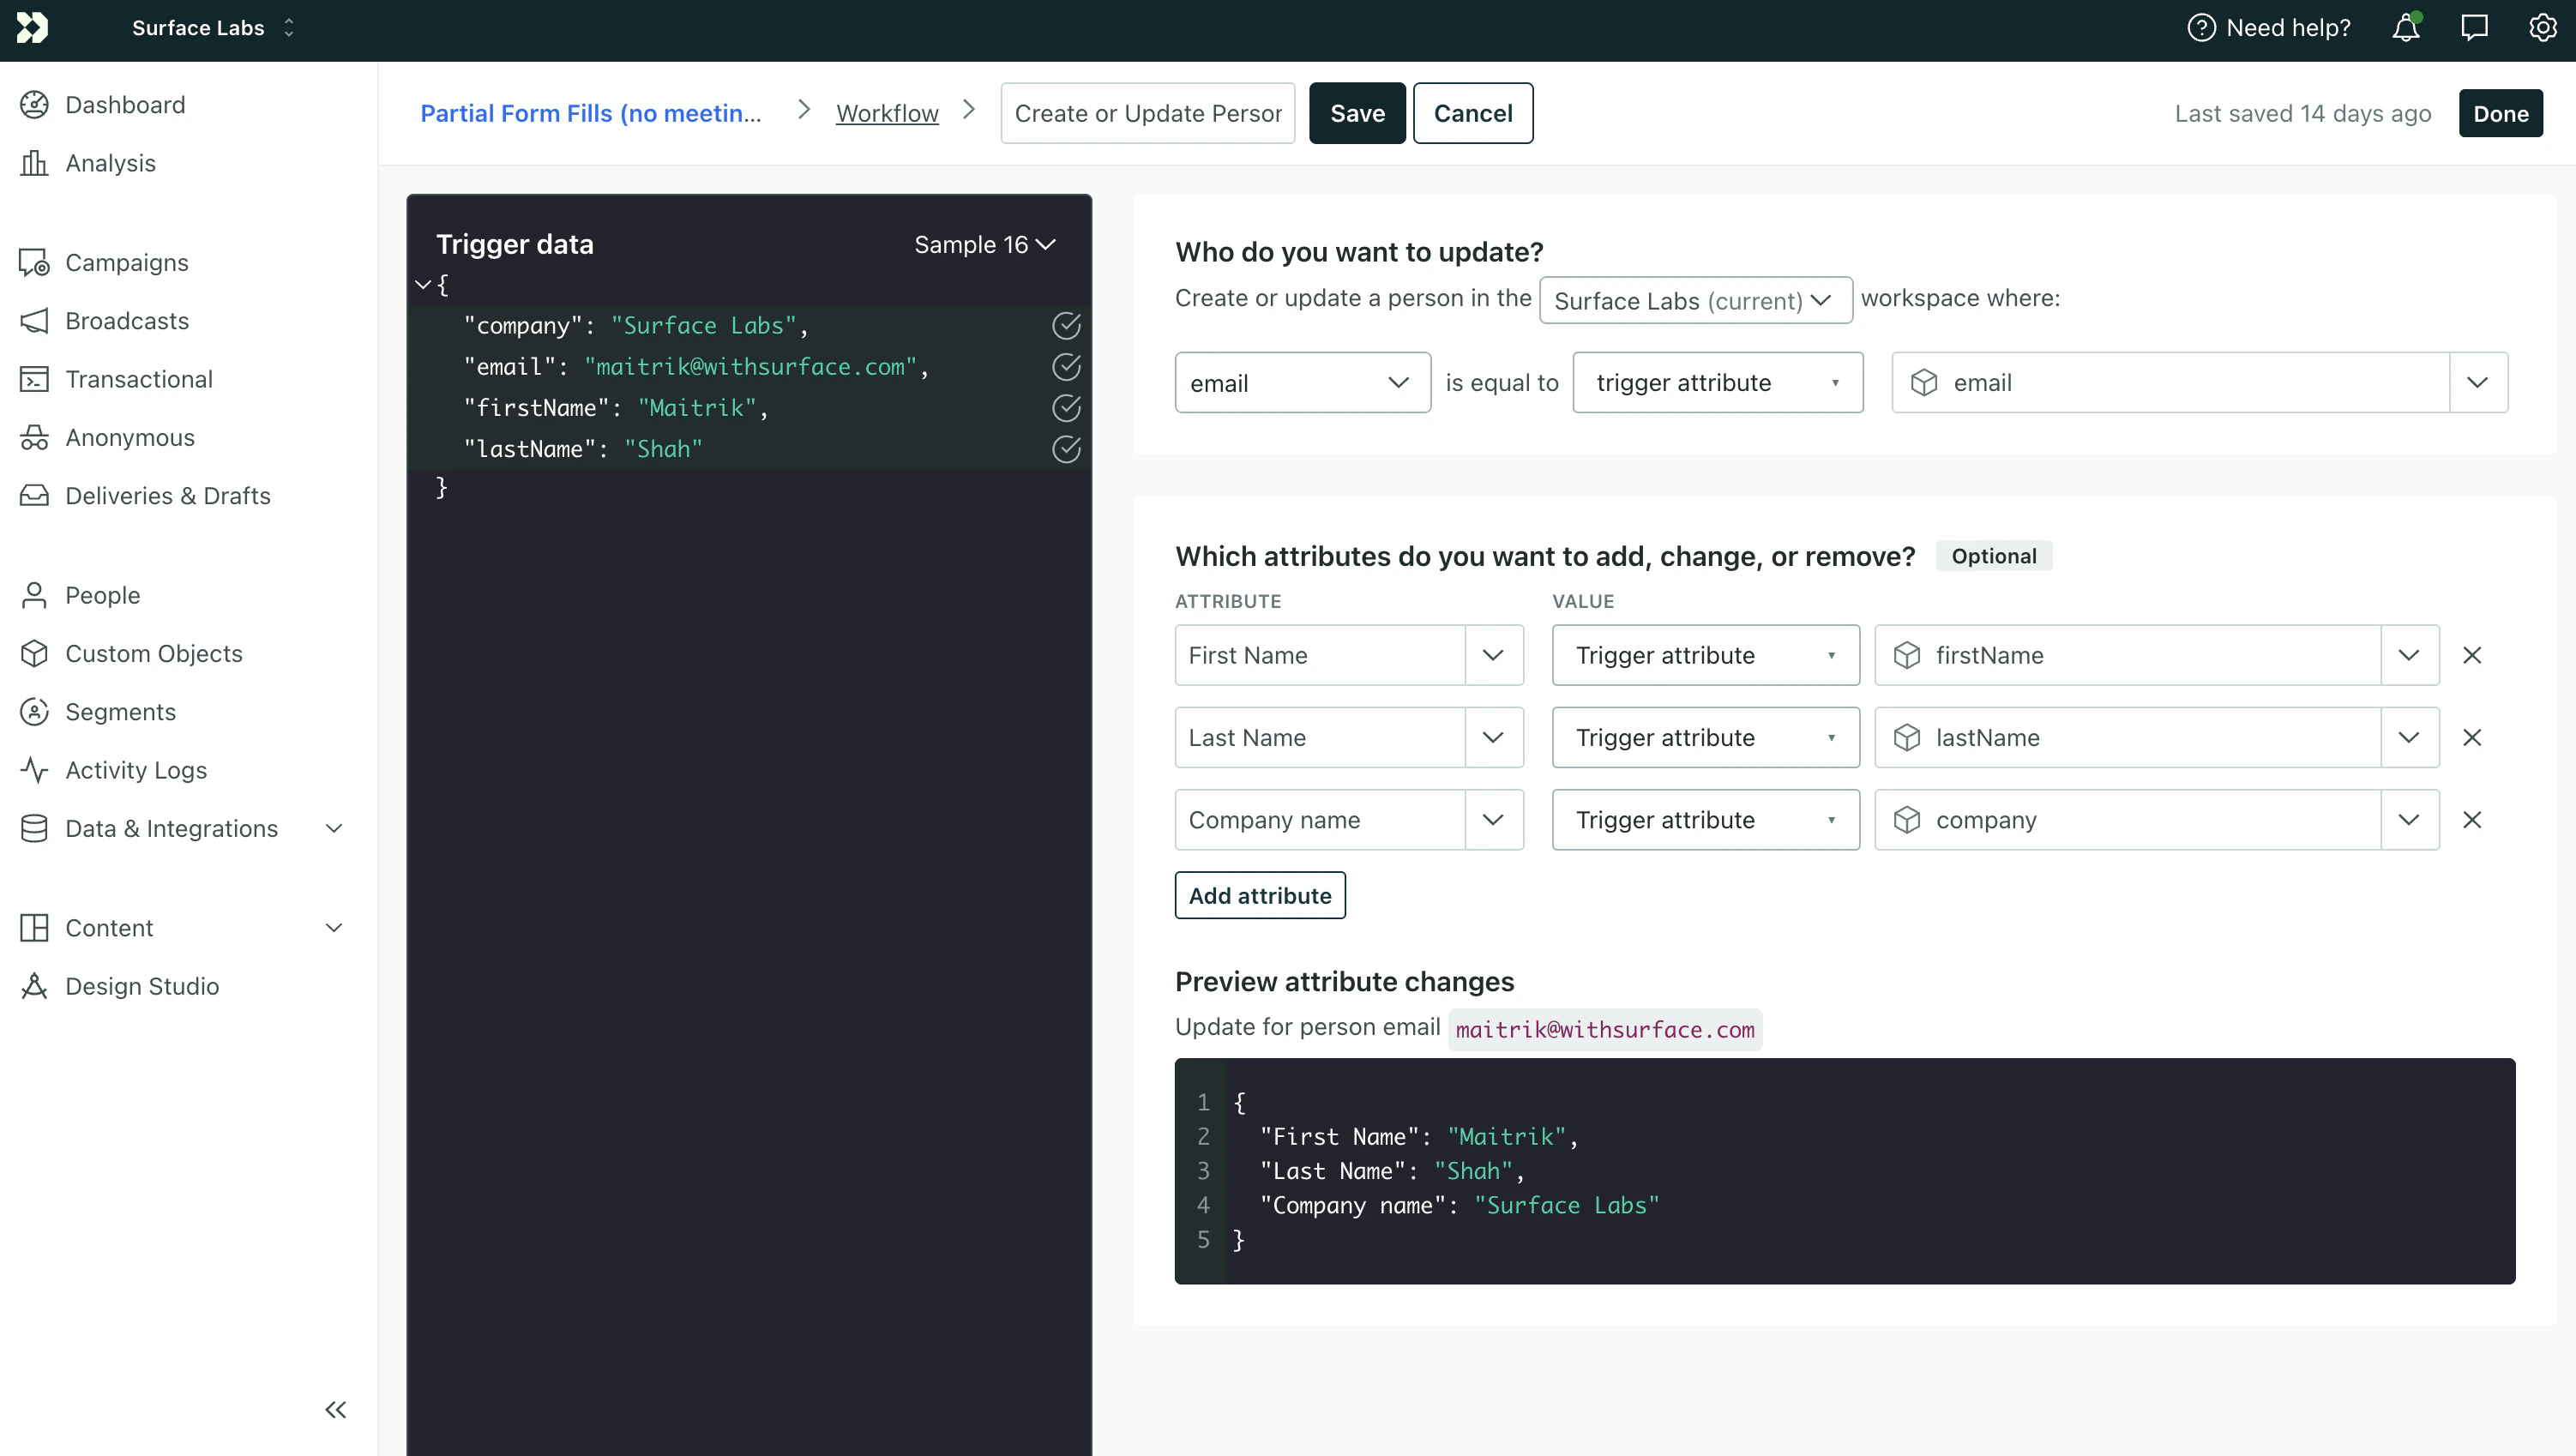
Add “Create or Update Person”
- Drag Create or Update Person into the workflow
- Give it a name (e.g., “Create/Update Lead”)
- Configure the action:
- Workspace: Select the workspace where you want to store leads
- Identifier: Use
email (or another field from your Surface form that uniquely identifies the lead)
- Identifier value: Map to
trigger.email (or the equivalent key from your webhook payload)
- Attributes: Add any additional attributes you want to store (e.g.,
firstName, lastName)
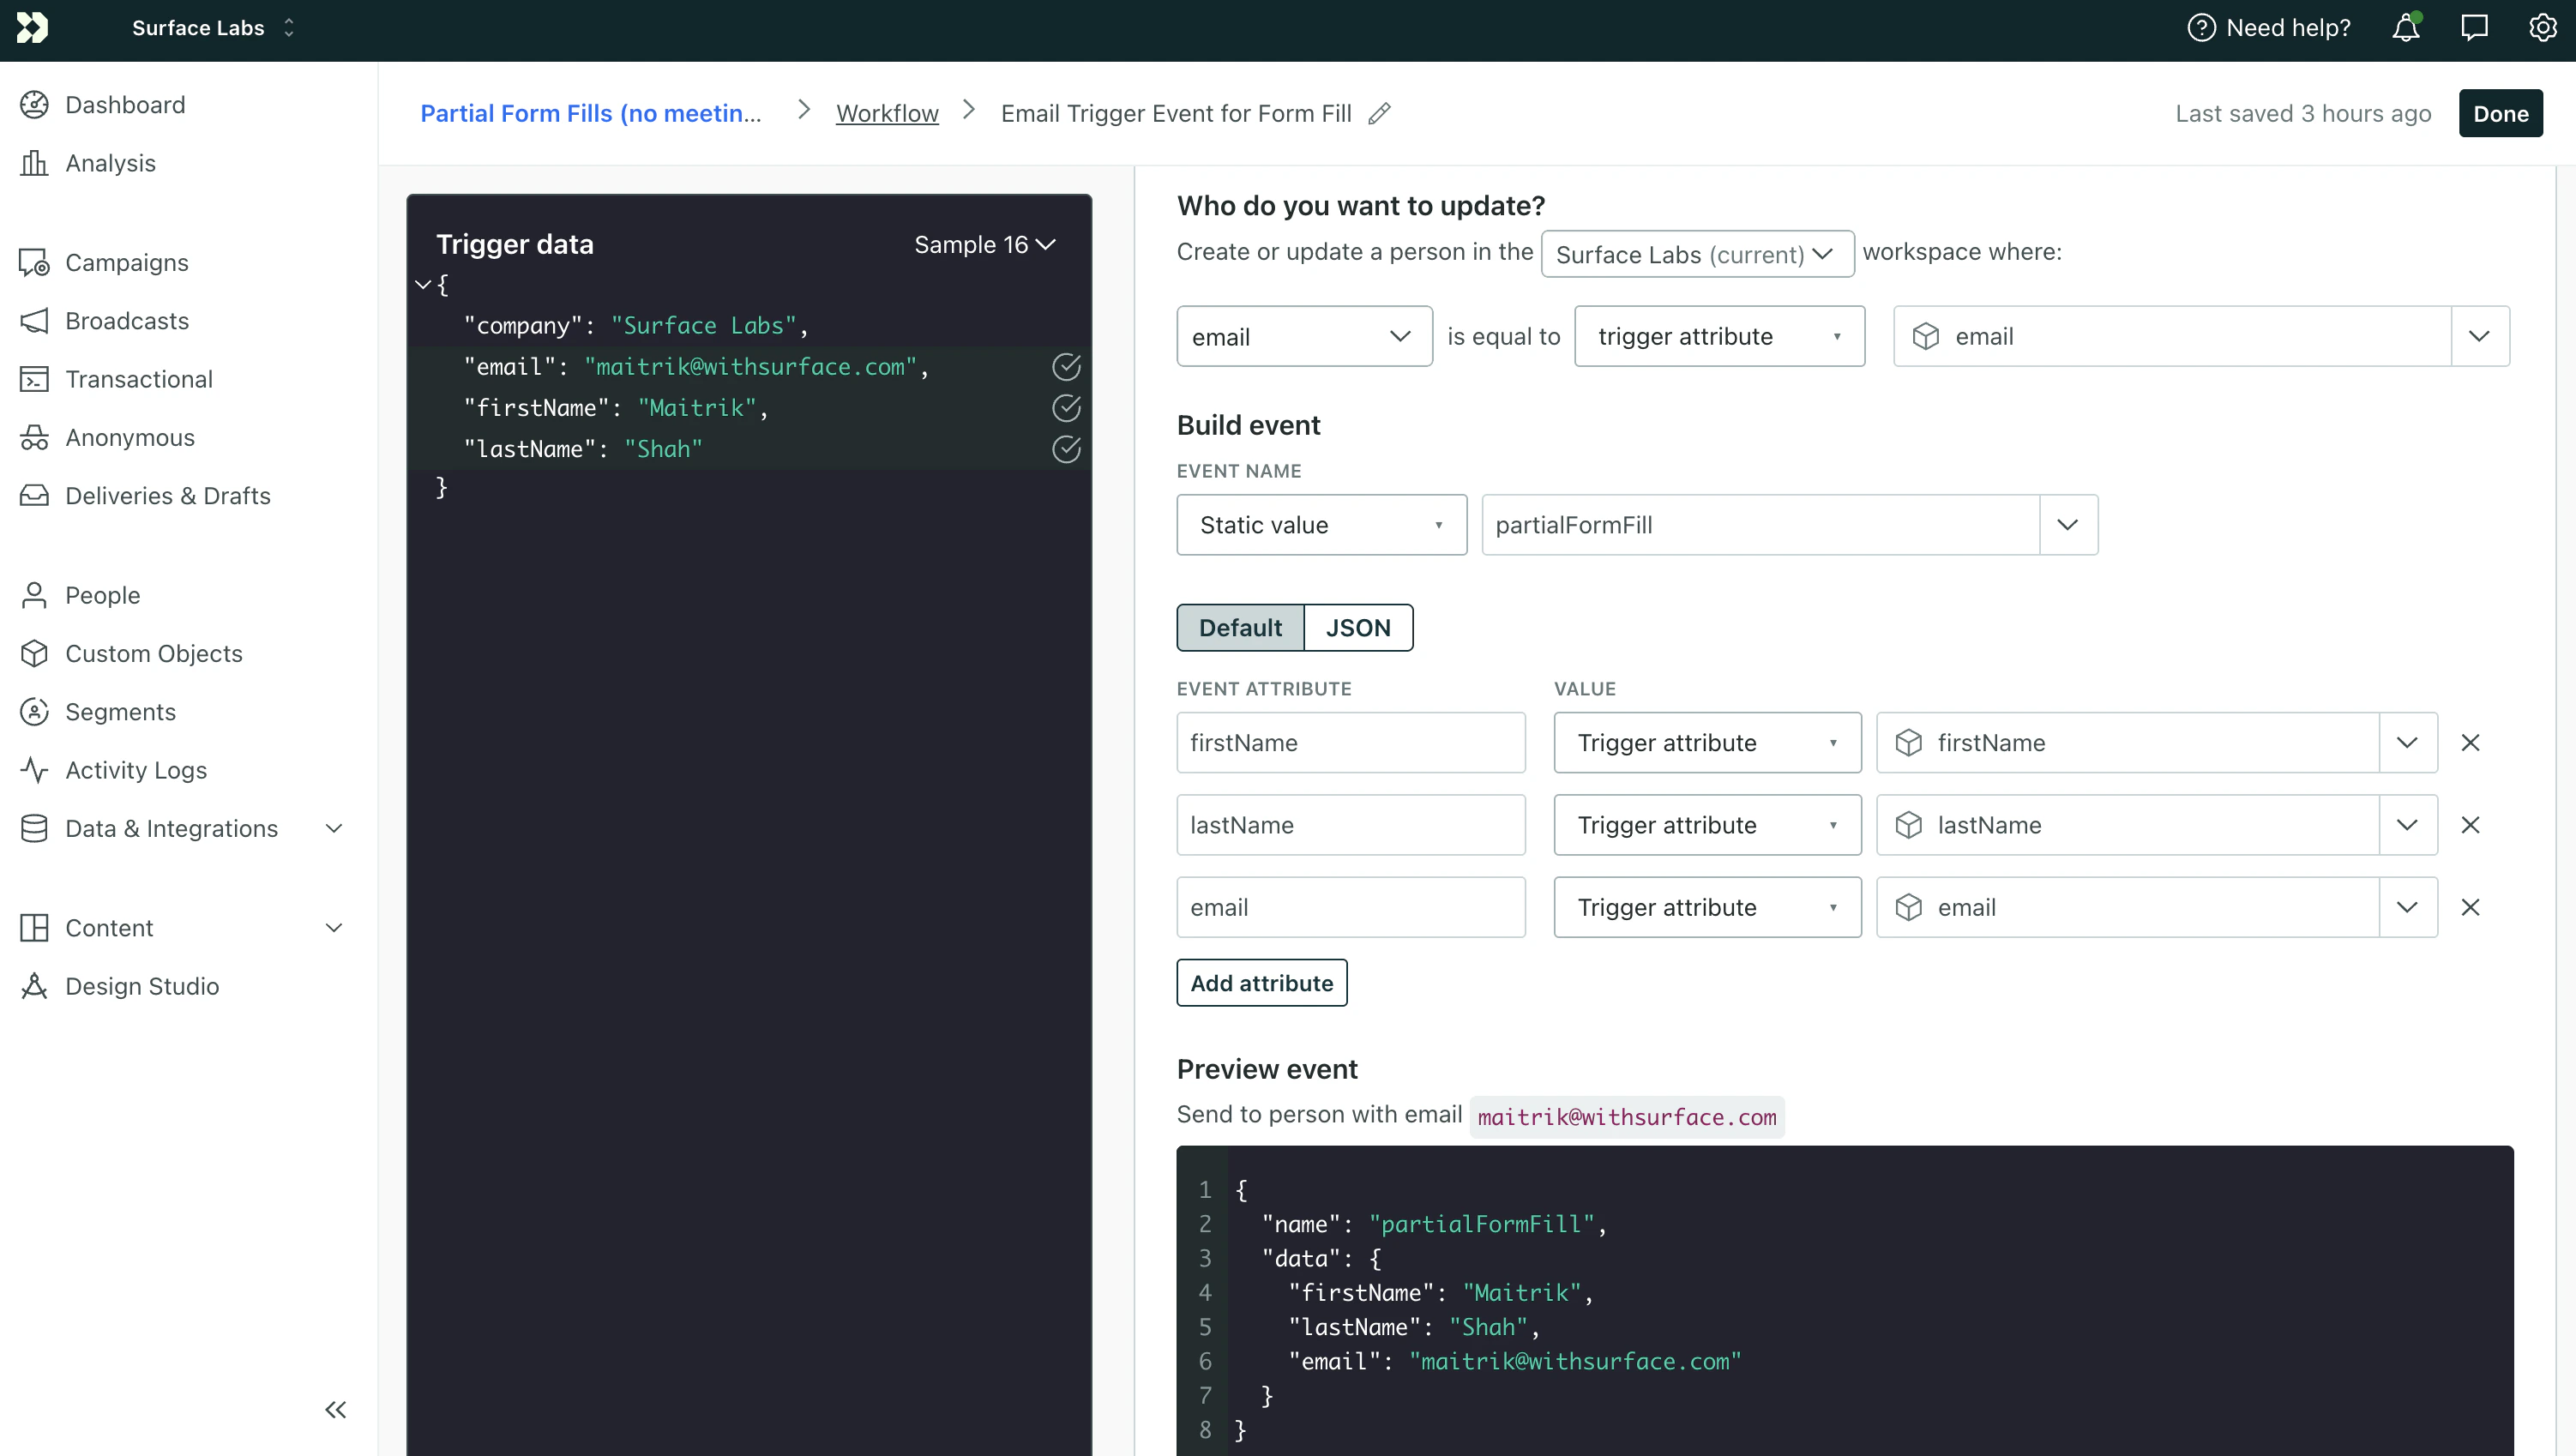
Add “Send Event”
- Drag Send Event into the workflow (after Create or Update Person)
- Give it a name (e.g., “Partial Form Fills”)
- Configure the event:
- Who do you want to update?: Select the same workspace
- Identifier: Use
email (or match your Create or Update Person identifier)
- Identifier value: Map to
trigger.email
- Event Name: Use
partialFormFilled (you’ll use this in your event-triggered campaign in Step 3)
Use the trigger object to reference incoming webhook data. For example,
trigger.email, trigger.firstName, or trigger.lastName. The exact keys
depend on the payload you send from Surface.
- Click Next to review, then Start Campaign
- Save the Webhook URL for the Dropped Off path
Repeat the same process for completed submissions:
- Create a new webhook campaign
- Copy the Webhook URL—you’ll use this for the Form Submission path in Step 2
- Add Create or Update Person (same configuration as above)
- Add Send Event with Event Name:
formCompleted
- Start the campaign and save the Webhook URL for the Form Submission path
You now have two webhook URLs—one for partial, one for completed. Surface will send to the appropriate URL based on whether the lead dropped off or completed the form.
Next Step
Configure your Surface workflow to send form data to the correct Customer.io webhook URL based on the trigger path. See Step 2: Configure Surface Workflow.