Guides
Link External HTML Form
A step-by-step guide to connect custom HTML forms with Surface Labs for partial response tracking, workflows, lead scoring, and enrichment
Ensure that the Surface Tag has been added to the site before proceeding.
Use Our Template
Start with our multi-step form template to simplify implementation.
Form Builder
Prefer a no-code solution? Use our form builder instead.
Step 1: Add the SurfaceExternalForm script to your site
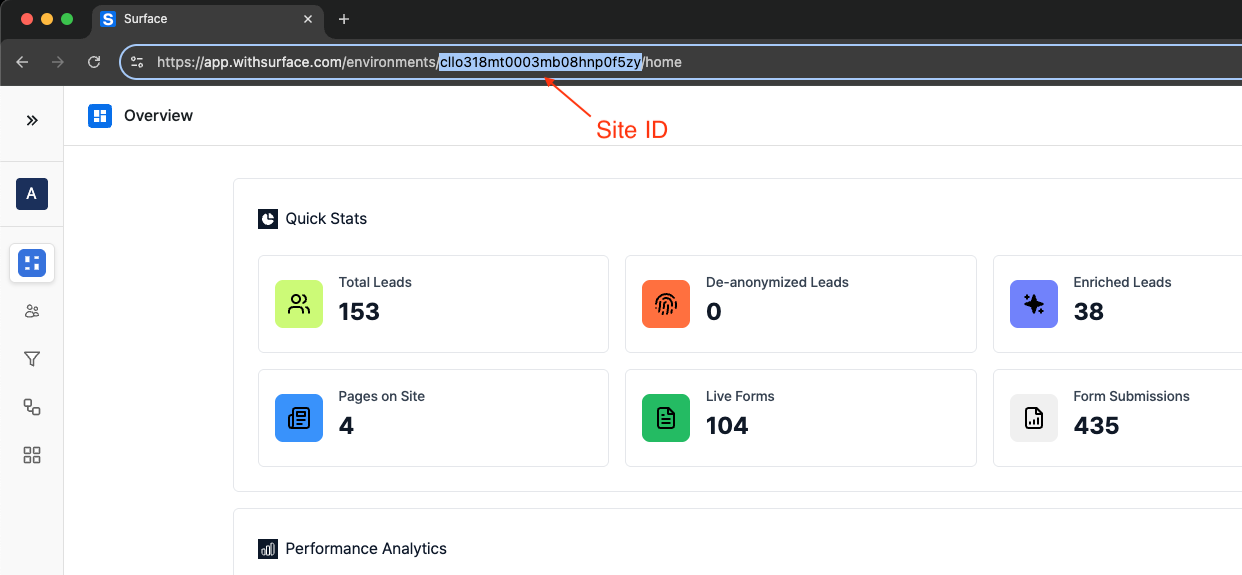
To ensure that the Surface Tag tracks the correct site, the siteId attribute must be added to the SurfaceExternalForm script.
Embed the script in the <head> or at the end of the <body> tag
The script must be added before the closing
</body> tag and replace SITE_ID with the site ID.Step 2: Create an external form in Surface
Create a new form in Surface Labs
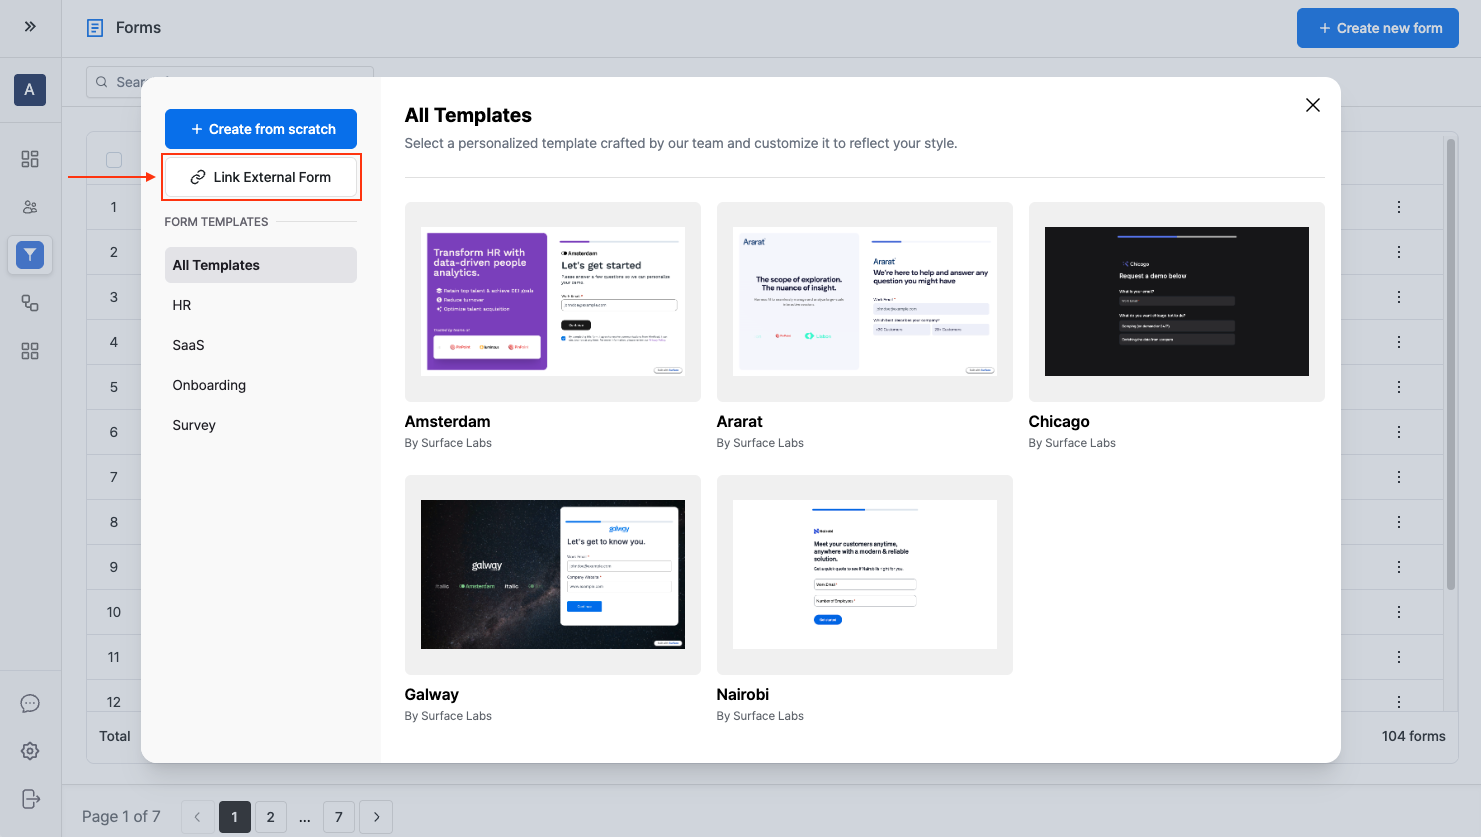
- Log in to the Surface Labs account.
- Navigate to the Forms section.
- Click “Create New Form”.
- Select “External Form Integration”.
Add required fields
When linking an external form, all fields that need to be tracked in Surface Forms must be added. The form builder provides several field types to match the form’s structure:
Available field types
- Identity Info: Collects personal information like name, email, or phone number.
- Short Input: For short text responses (single line).
- Long Input: For longer text responses (multi-line).
- Dropdown: For selection from predefined options.
- Multiple Choice: For radio button or checkbox selections.
Get integration details
After creating the form and adding all fields, the Component Question IDs for each form field must be obtained.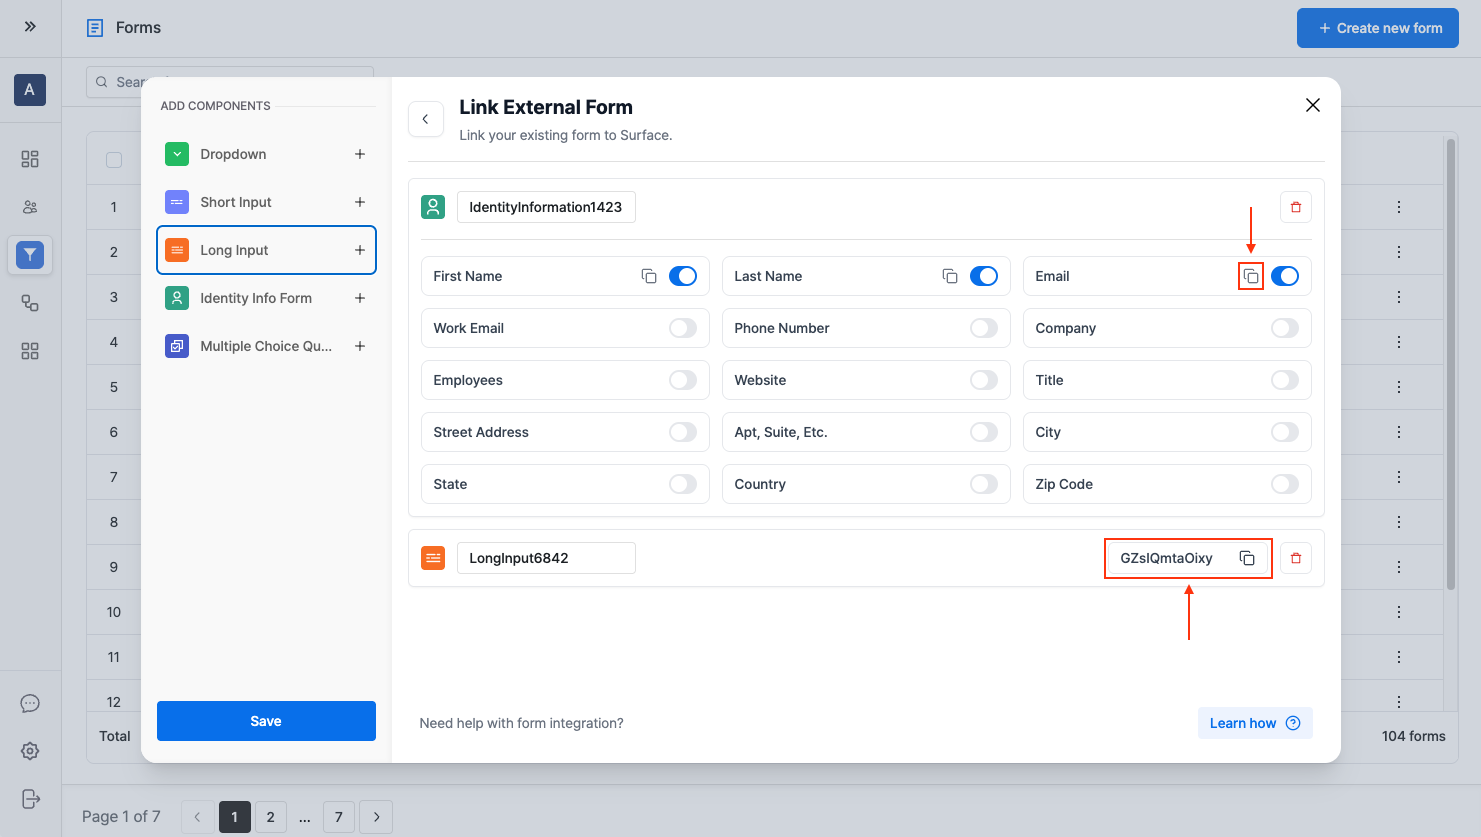
Step 3: Create a multi-step HTML form
Either create a custom multi-step form or use the starter template.- Clone the repository:
- Open the project and review the
index.htmlfile.
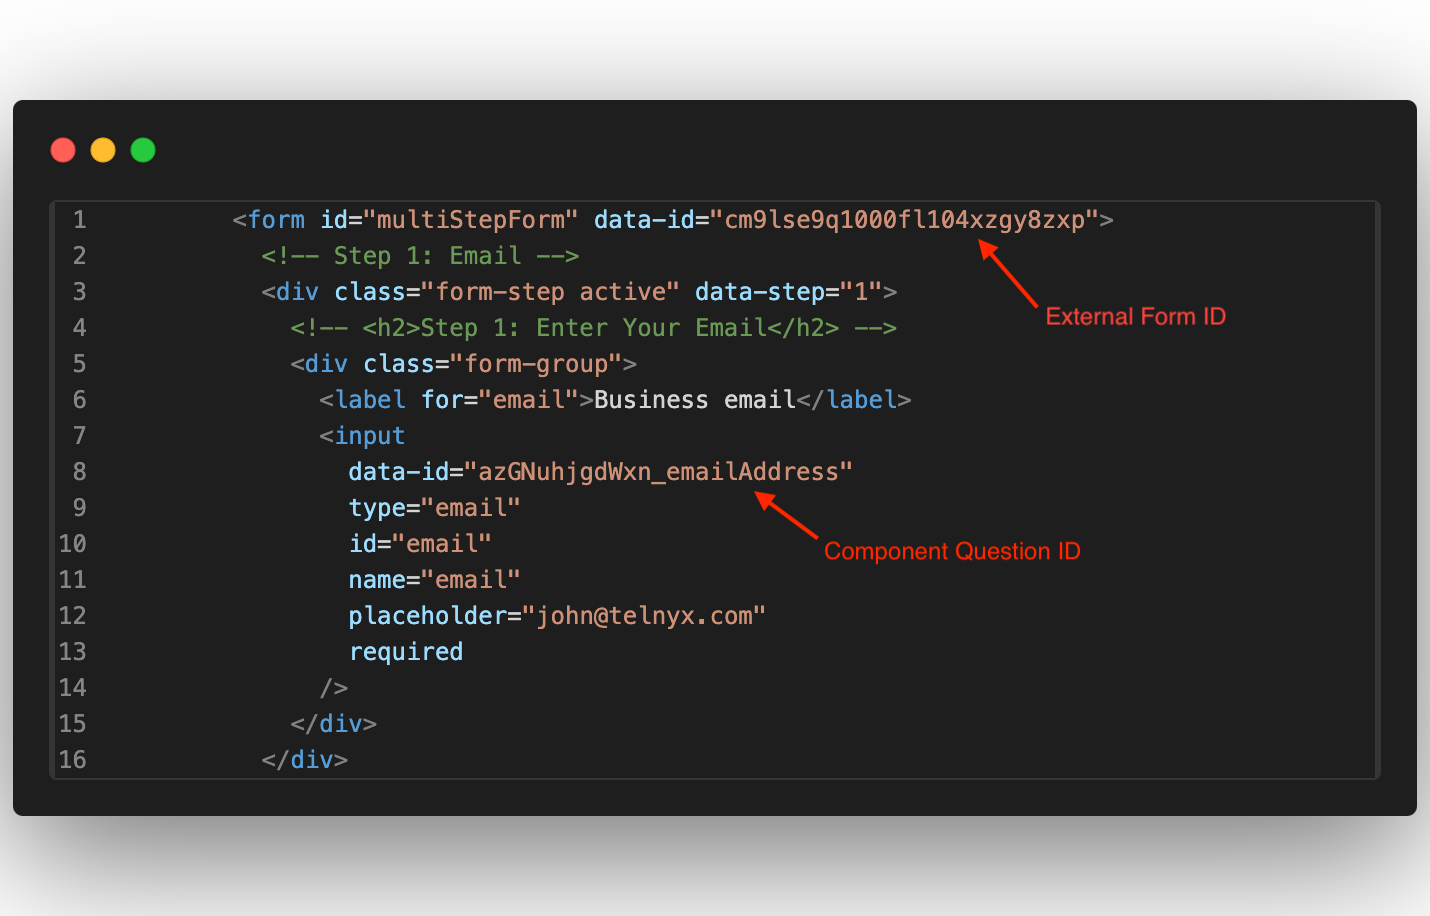
Add the form ID to the <form> tag
<Your_Form_ID> with the ID of the external form created in Surface Labs.
Add question IDs to form fields
Each field in the form requires a corresponding question ID from Surface Labs to be added to thedata-id attribute:
<Component_Question_ID> with the question ID obtained while adding components to the external form.
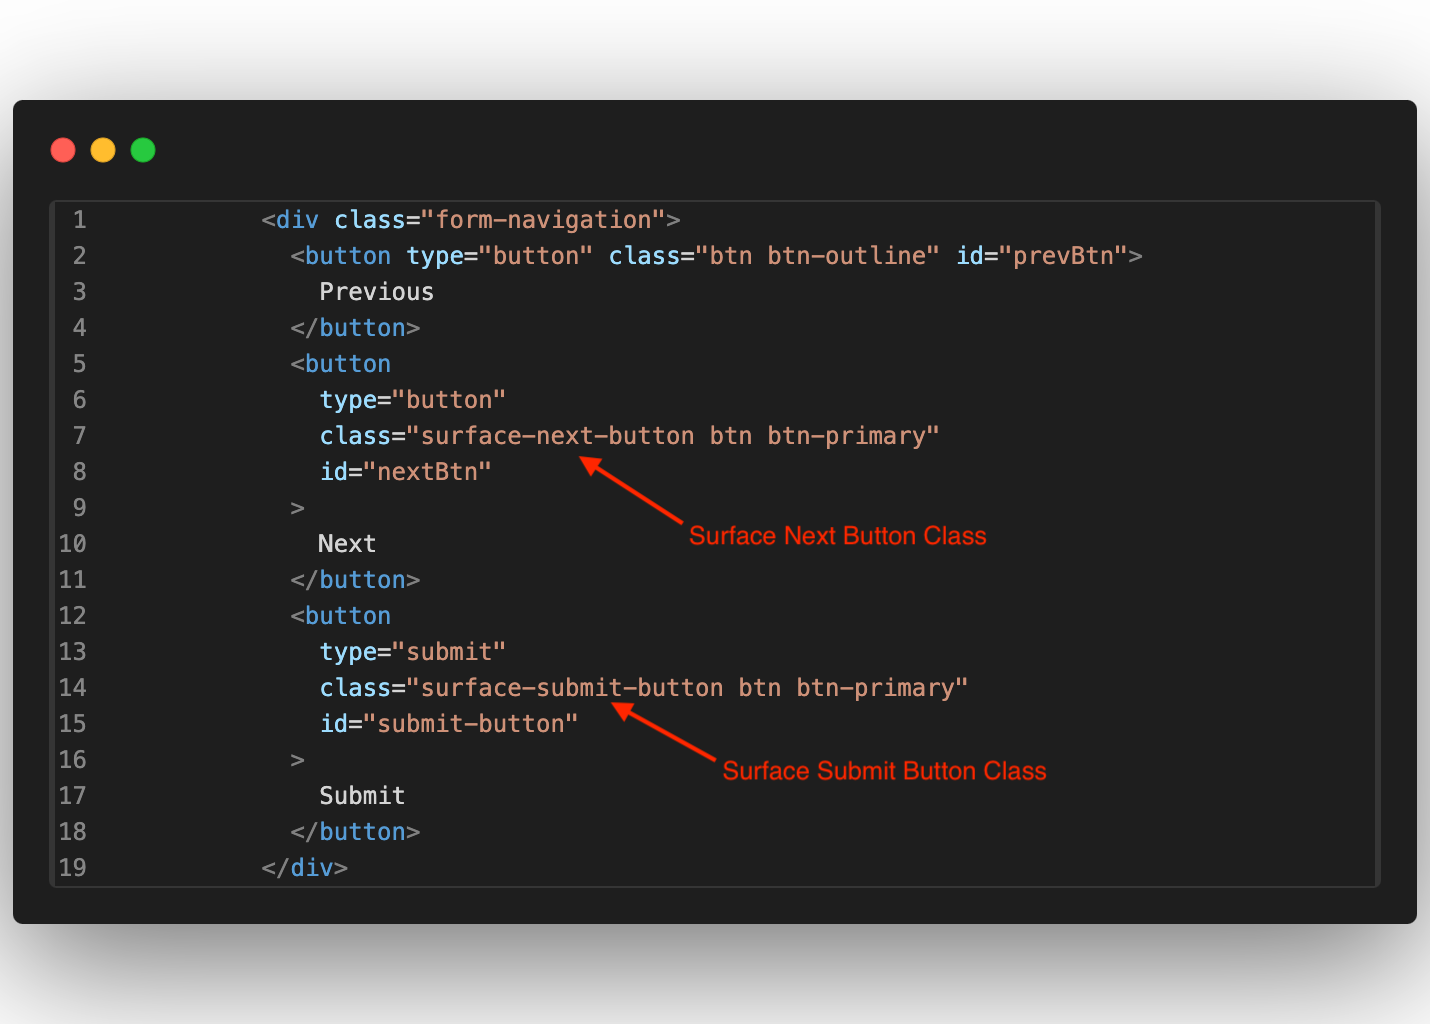
Add the surface-next-button class to buttons
Add thesurface-next-button class to all next buttons.
Add the surface-submit-button class to the submit button
Add thesurface-submit-button class to the submit button.
Troubleshooting
If issues are encountered:-
Form submissions not appearing:
- Verify the form ID is correct.
- Check that question IDs match those in Surface Labs.
- Ensure the Surface Tag is properly installed.
- Ensure the submit button has the
surface-submit-buttonclass.
-
Partial responses not tracking:
- Ensure that each ‘Next’ button has the
surface-next-buttonclass. - Check the network tab to confirm requests are being sent.
- Ensure that each ‘Next’ button has the
-
Script not working:
- Verify the script has the
deferattribute if added to the<head>tag. - Check the browser console for errors.
- Verify the script has the
Next Steps
Configure Workflows
Set up automated actions based on form submissions.
Lead Scoring
Configure lead scoring to prioritize high-value prospects.
Integrations
Connect Surface Labs to CRM, marketing tools, and more.
Analytics (Coming Soon)
Deep dive into form performance metrics.