Installation
Framer
Add a Surface Form to your Framer Site
Before proceeding, make sure you have installed the Surface Tag on your website. Follow this guide to install the Surface Tag first:
1
Navigate to the Framer site settings.
2
Scroll down to Custom Code section.
3
Add the following code in the Start of
<head> tag section.Check out the How to Get Site ID page to get your site ID.
Embed a Surface Form in Framer
Make sure that you have added the Surface Tag to your Framer site before proceeding.
1. Embedding Surface Form
- In framer, click on
insertto add new component inside the website. - Select
Embedfrom the list of components.
- Insert the component in the desired location. Now go to
propertiesof the component and scroll down to theEmbedsection. - Set the
TypetoURLand paste your form URL in theURLfield.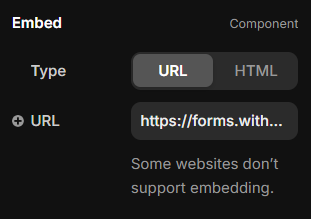
- That should look something like this:

2. Publish the site
Publish the site and that’s it! You have successfully embedded a Surface Form in your Framer project.Send Framer Form Data to Surface Leads using Webhooks
You can also send form submissions from Framer to Surface Leads using a webhook. This allows you to collect lead data directly in your Surface Leads Hub.1. Add Form Component in Framer
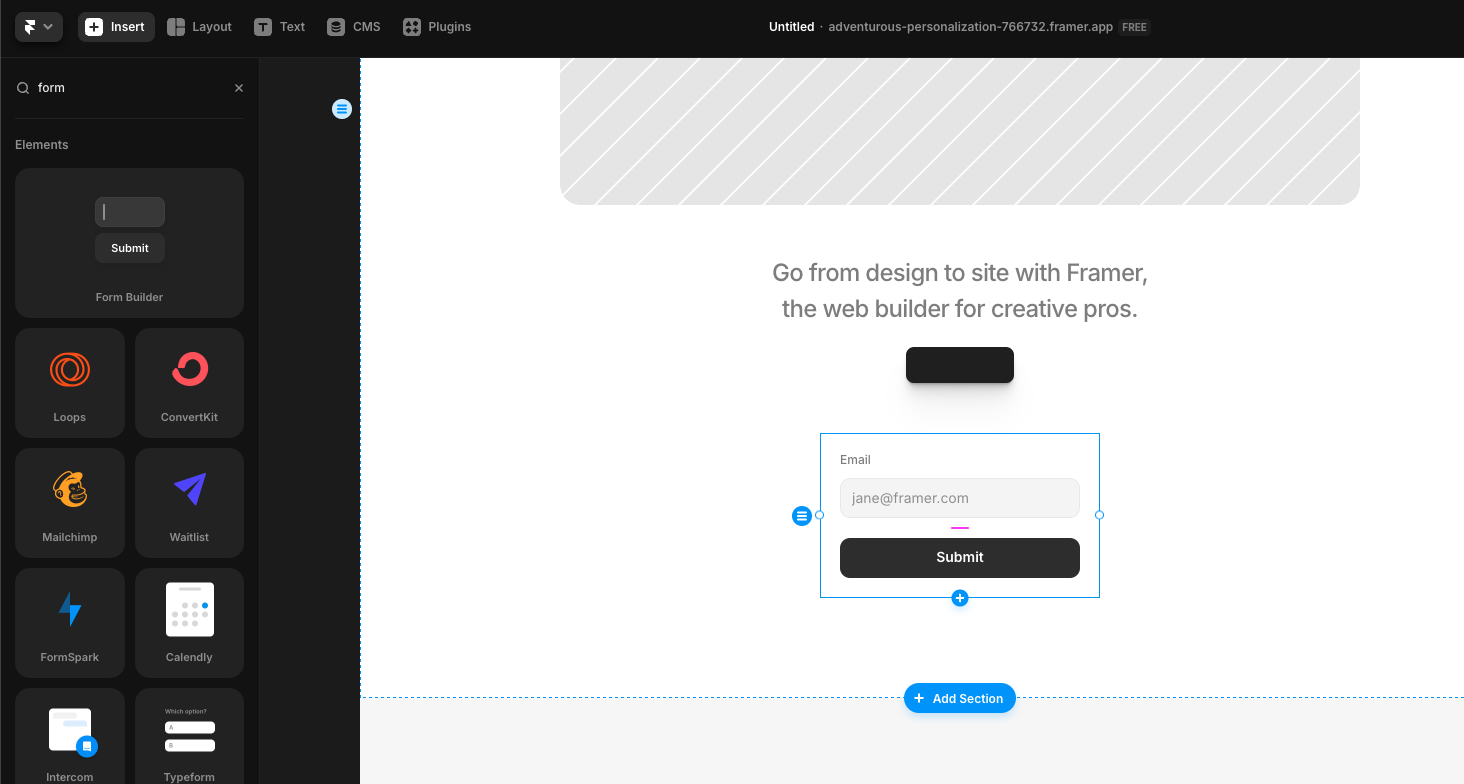
- In your Framer project, click on “Insert” to add a new component
- Search for “Form” in the components list and add it to your page
- Configure the form fields according to your needs (name, email, etc.)
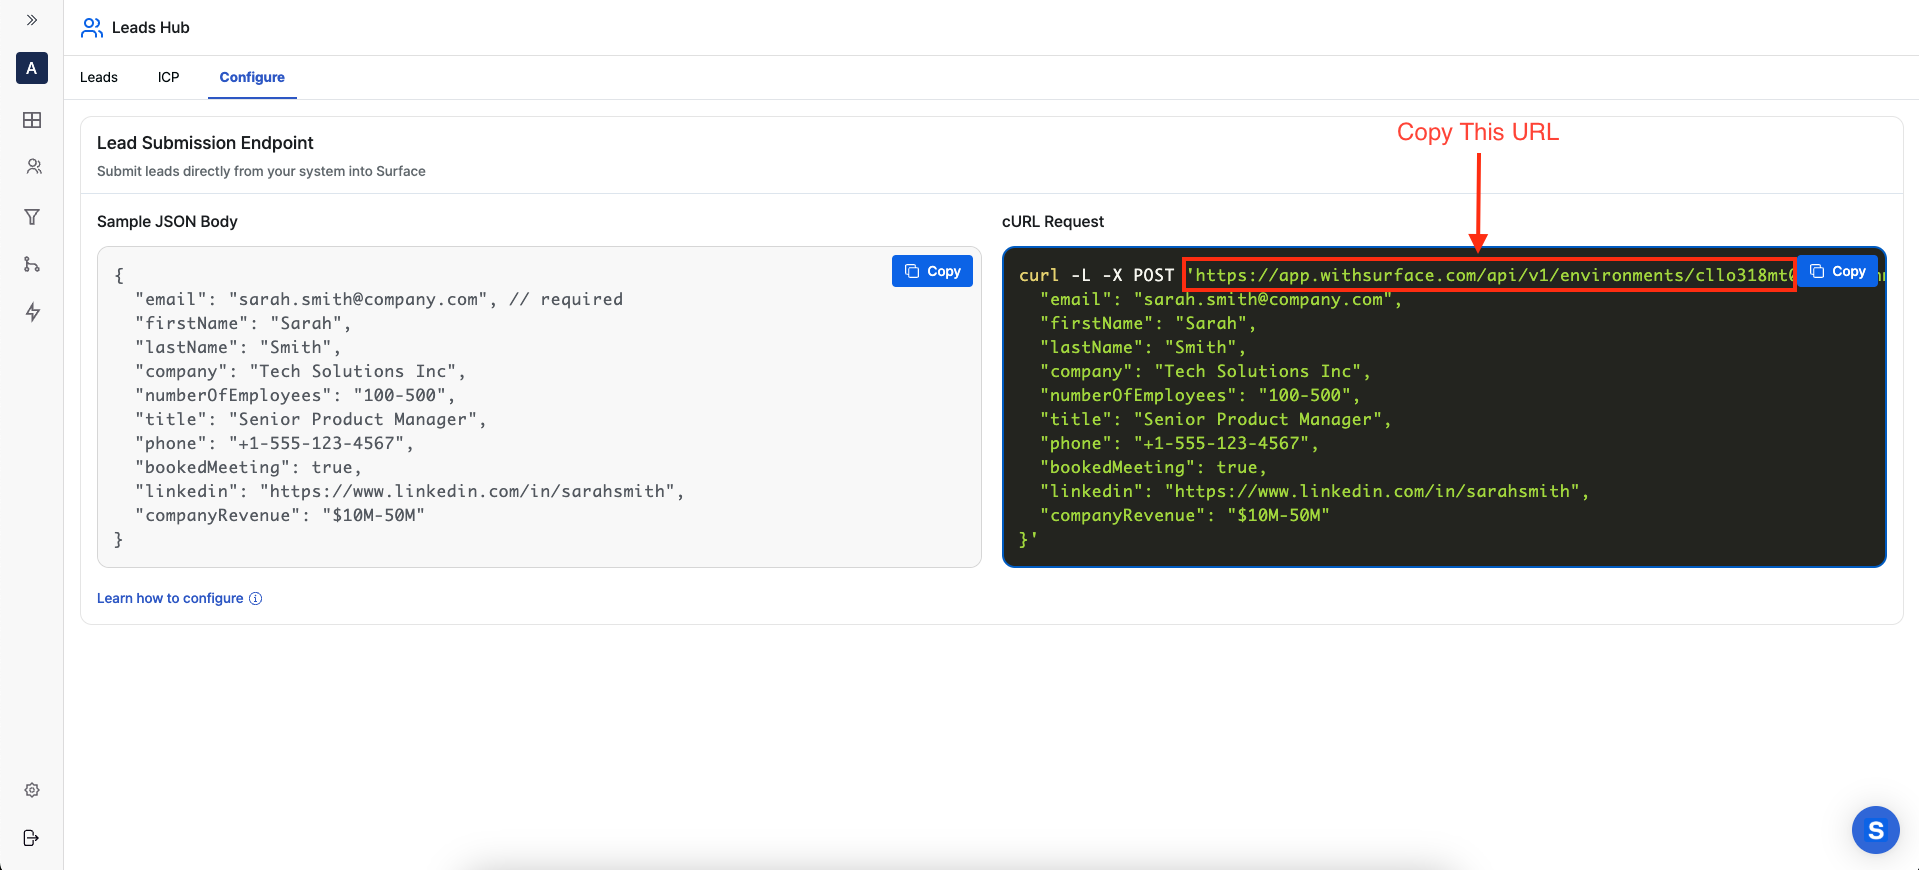
2. Get Surface Webhook URL
- Log in to your Surface account
- Navigate to Leads Hub from the sidebar
- Click on the “Configure” tab
- Locate the “Lead Submission Endpoint” section
- Copy the webhook URL from the cURL command provided
3. Match Field Names
Ensure that the input field names in your Framer form match the field names expected by Surface Leads Hub:| Surface Lead Field | Description |
|---|---|
email | Required field for the lead’s email address |
firstName | Lead’s first name |
lastName | Lead’s last name |
company | Lead’s company name |
numberOfEmployees | Company size |
title | Lead’s job title |
phone | Lead’s phone number |
bookedMeeting | Meeting status |
linkedin | LinkedIn profile URL |
companyRevenue | Company’s revenue information |
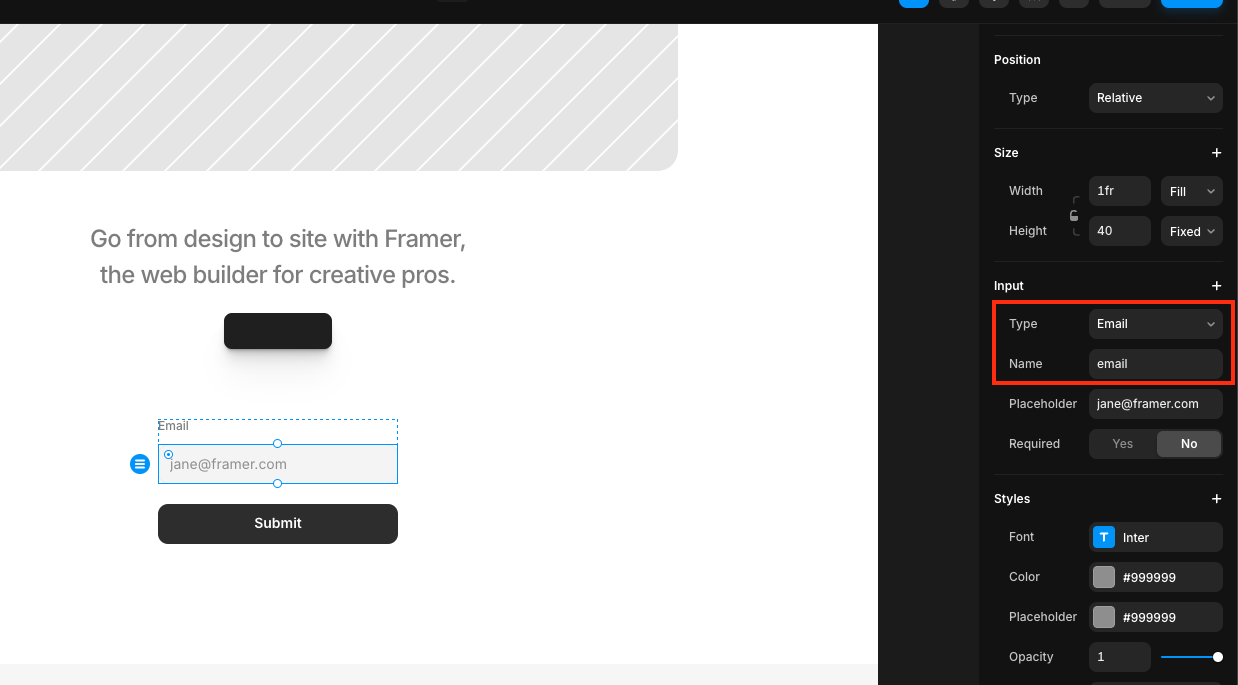
- Select each form input field
- In the properties panel, find the “Name” property
- Set the name to match the corresponding Surface lead field (e.g., “email”, “firstName”)
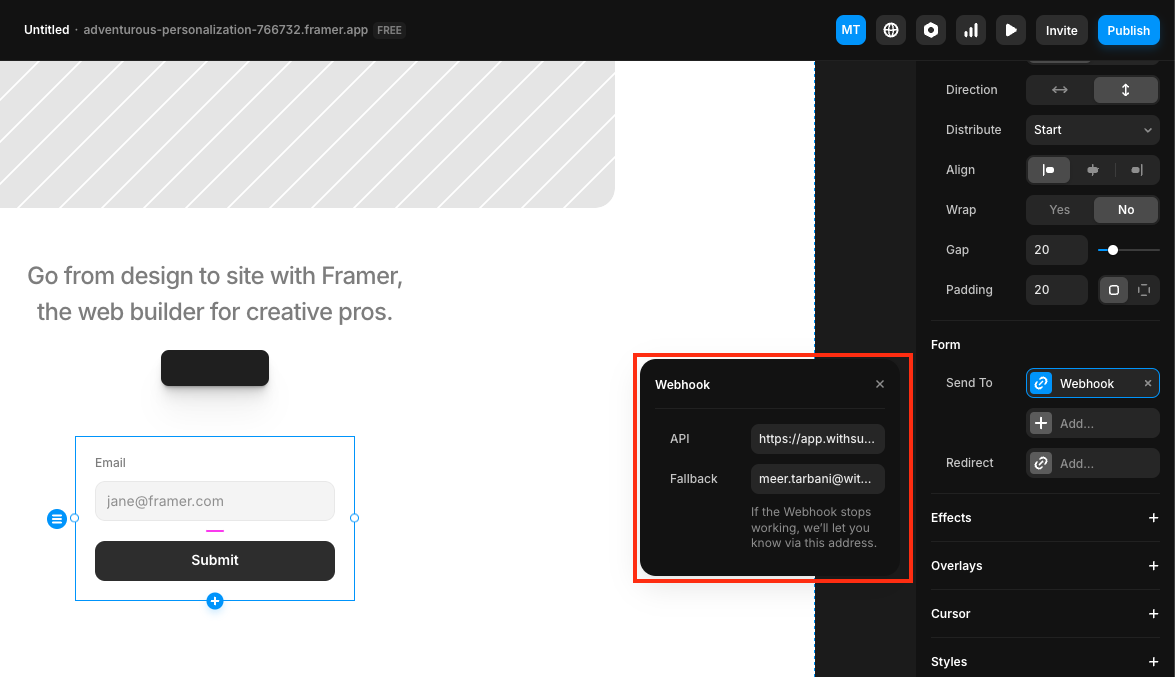
4. Configure Form to Send Data to Webhook
- Select your form component in Framer
- In the properties panel, scroll down to the “Form” section
- Find the “Send to” dropdown and select “Webhook”
- Paste the Surface webhook URL you copied earlier in the provided field
5. Test the Integration
- Publish your Framer site or preview it
- Fill out and submit the form with test data
- Go to your Surface Leads Hub and check the leads table to verify that the submission was received correctly
Troubleshooting
If your form submissions are not appearing in Surface Leads Hub:- Verify that the webhook URL is correct
- Check that the form field names match the expected Surface lead field names
- Ensure your form is properly configured to send data to the webhook
- Try submitting the form again and refresh your Surface Leads Hub