> ## Documentation Index
> Fetch the complete documentation index at: https://docs.withsurface.com/llms.txt
> Use this file to discover all available pages before exploring further.
# Step 2: Configure HubSpot in Surface Workflow
> Set up workflows in Surface to send form submissions to HubSpot
After configuring your HubSpot form, you need to set up workflows in Surface to send form submissions to HubSpot. This guide covers connecting HubSpot and configuring the workflow action.
## Connect HubSpot to Surface
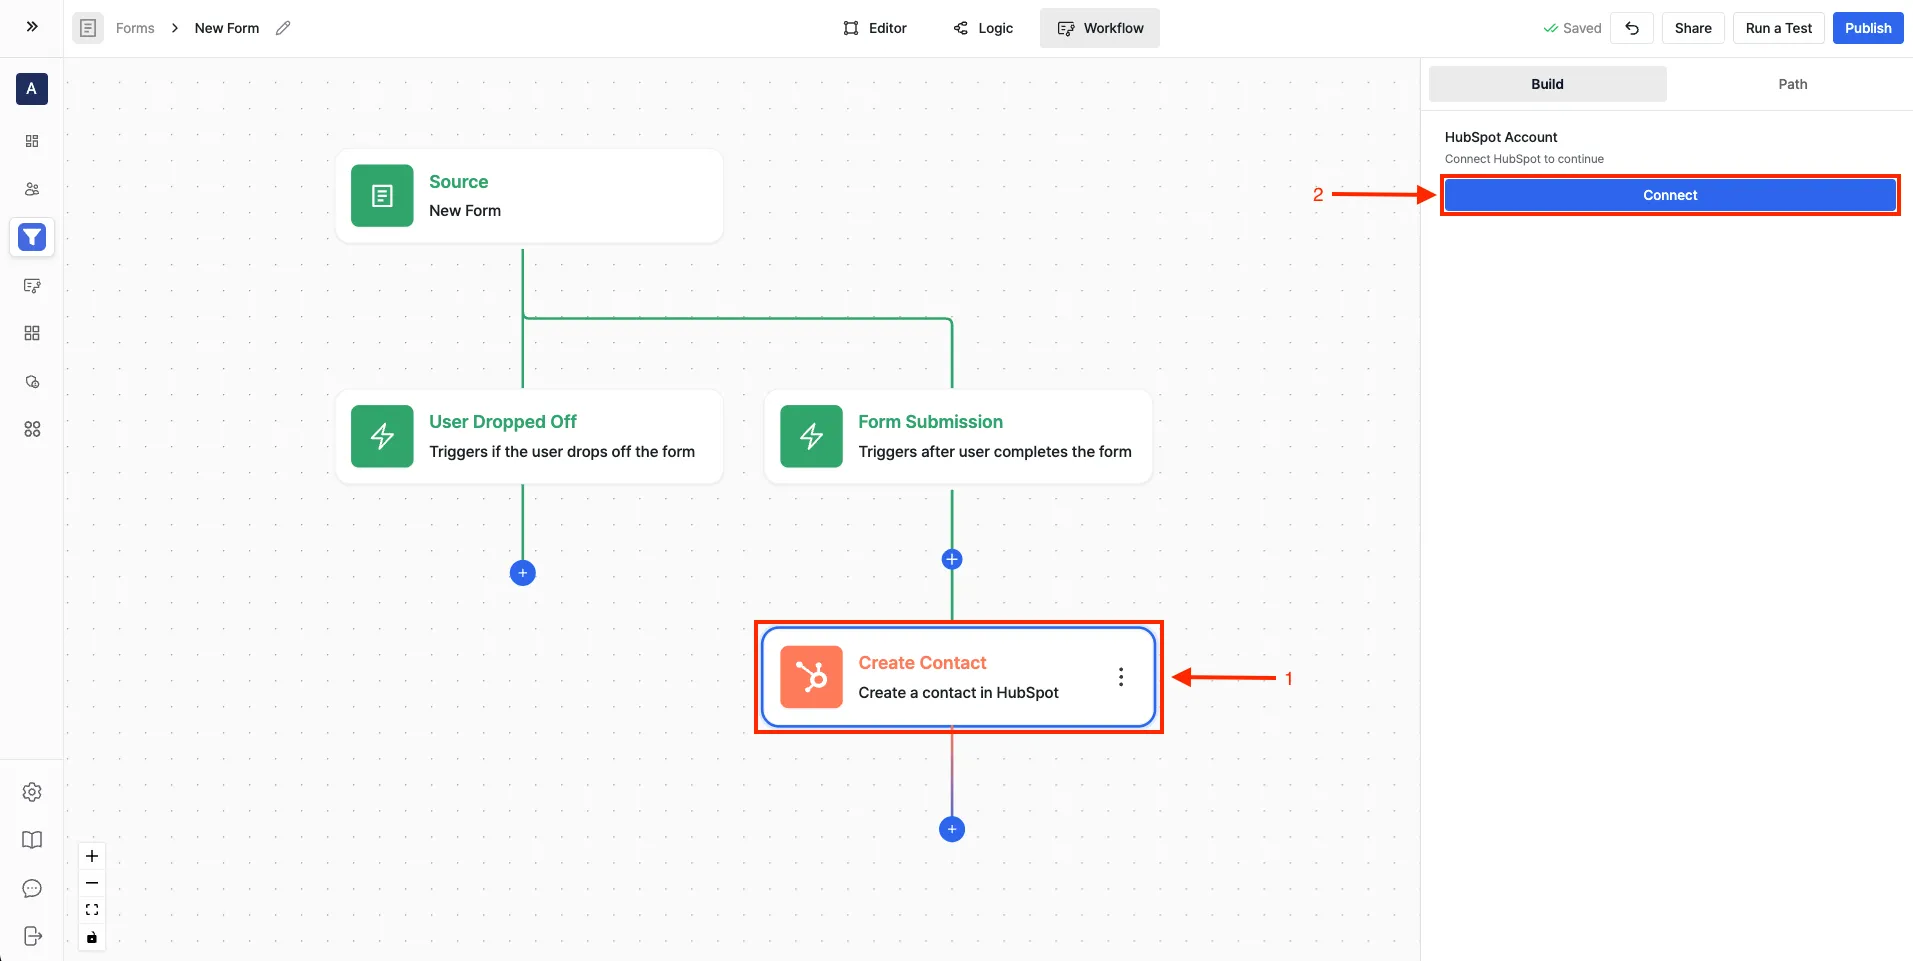 1. Navigate to the **Workflow Builder** in Surface
2. Add any HubSpot action and click **Connect**
3. Select your HubSpot organization when prompted
4. Accept Surface Labs invite
5. Click **Connect App** to complete setup
## Create a Workflow
1. Go to **Workflow Builder** from the sidebar
2. Click **Create workflow**
3. Choose trigger type:
* **Finished** - For complete submissions
* **Dropped Off** - For partial submissions
## Add HubSpot Action
1. Navigate to the **Workflow Builder** in Surface
2. Add any HubSpot action and click **Connect**
3. Select your HubSpot organization when prompted
4. Accept Surface Labs invite
5. Click **Connect App** to complete setup
## Create a Workflow
1. Go to **Workflow Builder** from the sidebar
2. Click **Create workflow**
3. Choose trigger type:
* **Finished** - For complete submissions
* **Dropped Off** - For partial submissions
## Add HubSpot Action
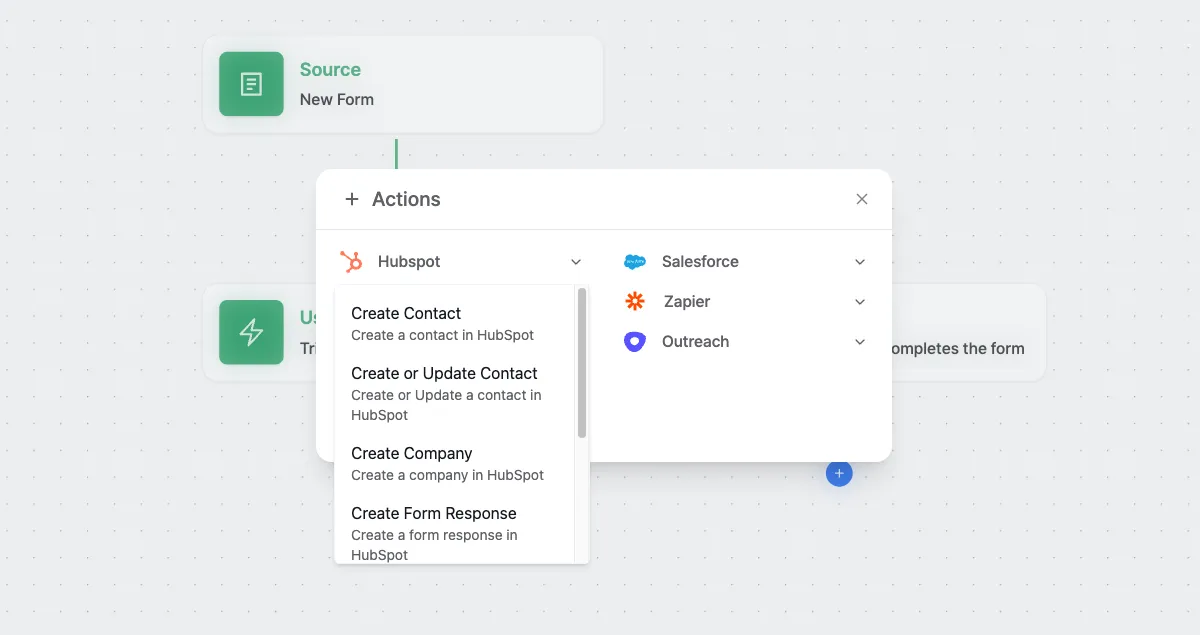 1. Click **+ Actions**
2. Select **HubSpot** from the actions list
3. Choose **Create Form Response** action
## Configure Form Response Action
### Select your HubSpot Form
1. Click **+ Actions**
2. Select **HubSpot** from the actions list
3. Choose **Create Form Response** action
## Configure Form Response Action
### Select your HubSpot Form
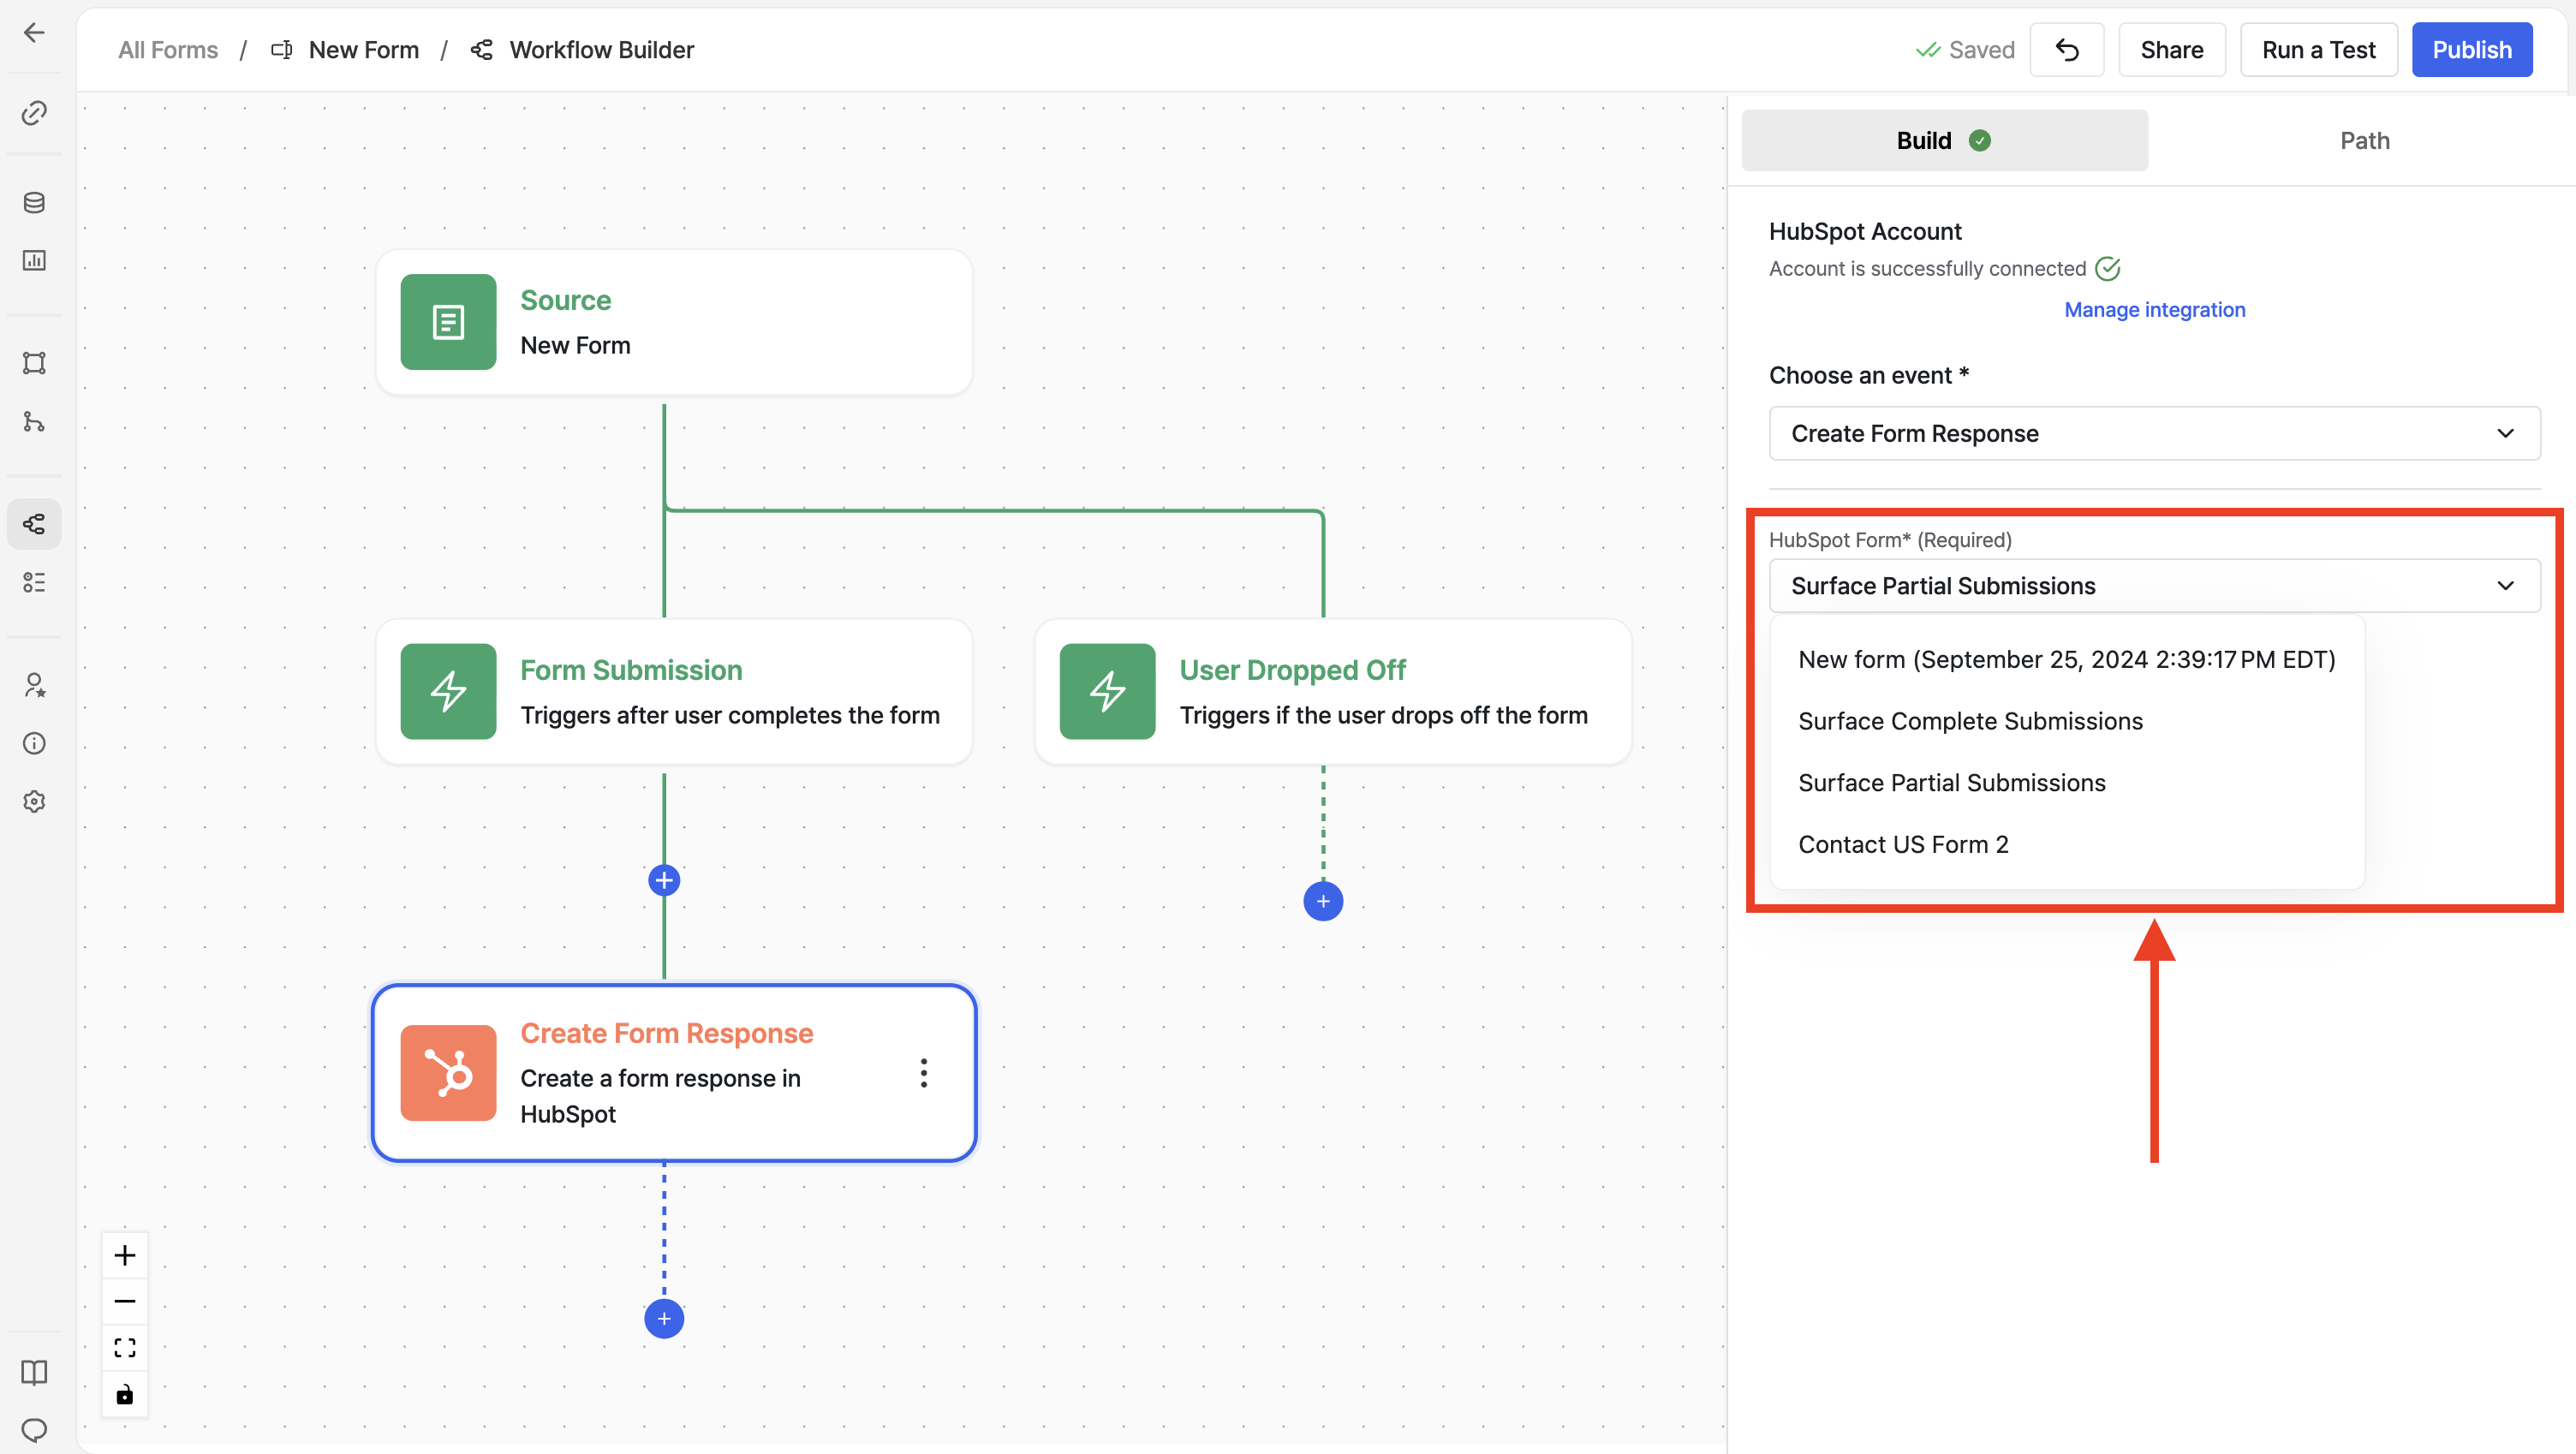 1. Click on the **HubSpot Form** dropdown
2. Select the form you want to use for this workflow
### Get Internal Names from HubSpot Form Fields
Before mapping fields, you need to get the **internal names** (also called API names) of your HubSpot form fields. These internal names are what you'll use as the **value** when mapping in Surface workflows.
1. Click on the **HubSpot Form** dropdown
2. Select the form you want to use for this workflow
### Get Internal Names from HubSpot Form Fields
Before mapping fields, you need to get the **internal names** (also called API names) of your HubSpot form fields. These internal names are what you'll use as the **value** when mapping in Surface workflows.
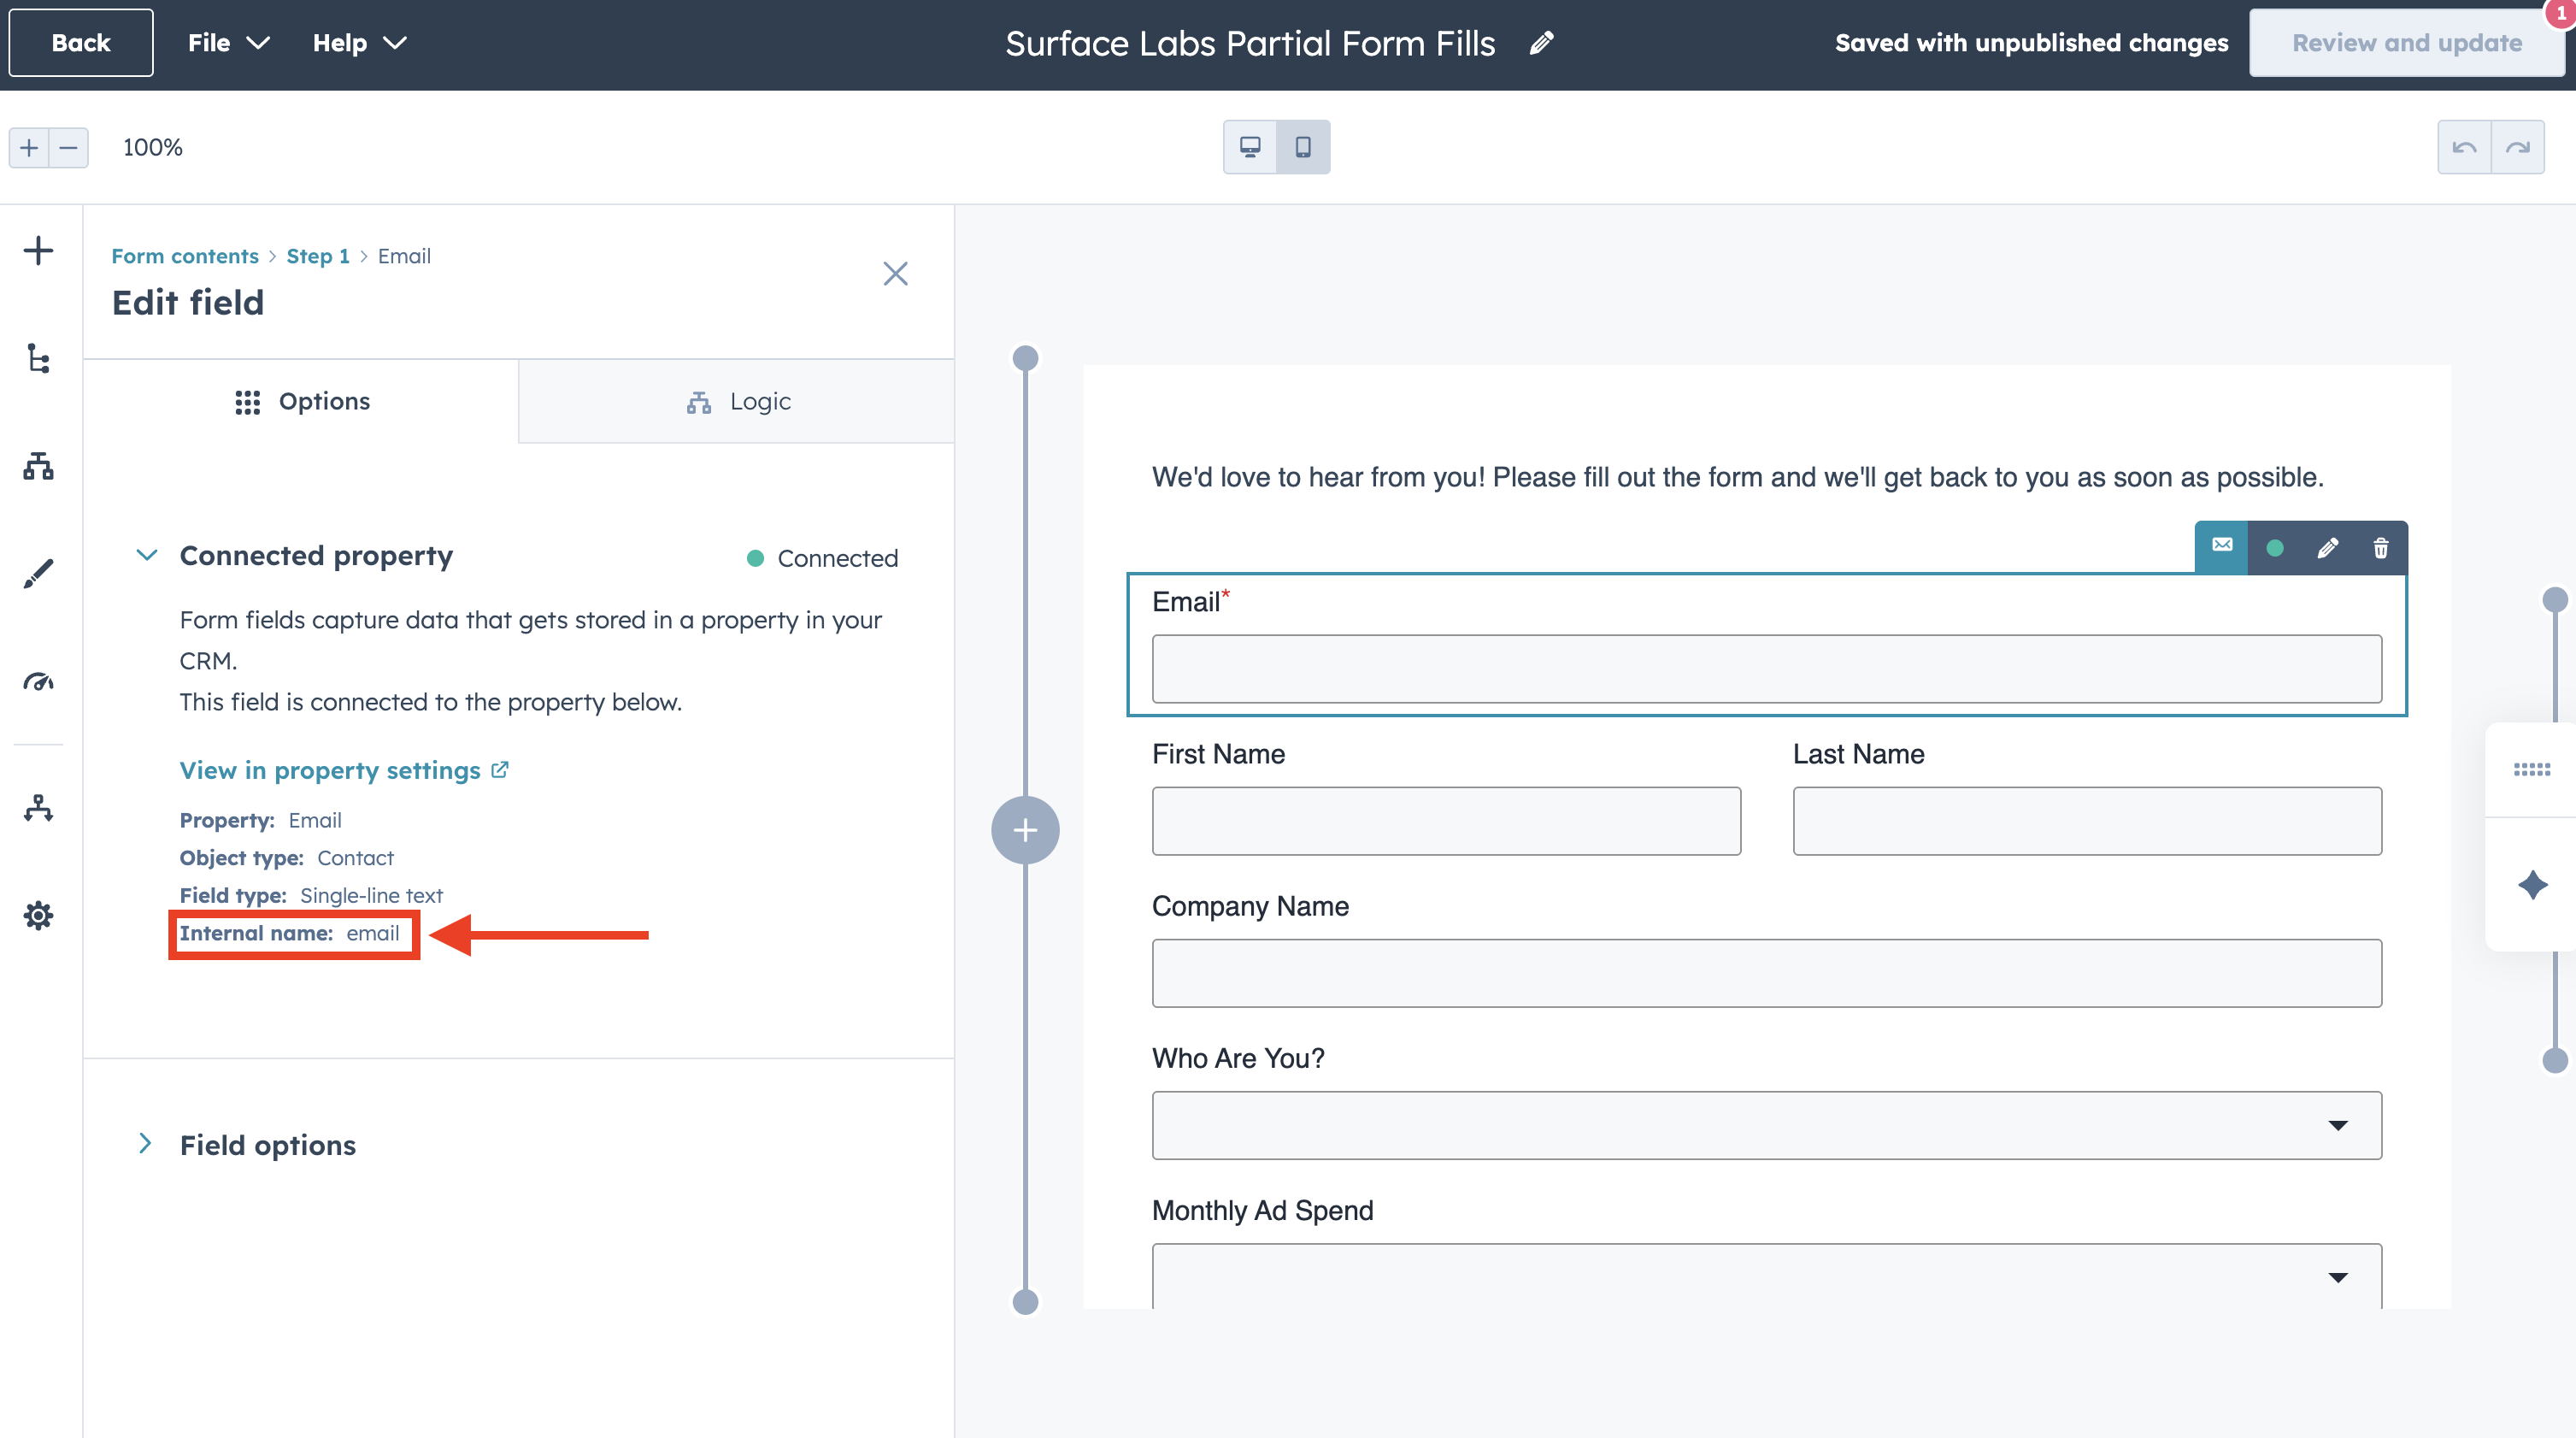 To find the internal name for each HubSpot form field:
1. In your HubSpot form editor, **select the field** you want to map (e.g., Email or First Name)
2. In the **Edit field** panel on the left, click on **Connected property** (it will show as "Connected" with a green indicator)
3. Under the Connected property section, you'll see the **Internal name** (e.g., `email` or `firstname`)
The internal name is different from the field label. For example, a field labeled "Email Address" might have an internal name of `email` or `emailaddress`. Always use the exact internal name shown in the Connected property section.
### Map Surface Form fields to HubSpot form fields
To find the internal name for each HubSpot form field:
1. In your HubSpot form editor, **select the field** you want to map (e.g., Email or First Name)
2. In the **Edit field** panel on the left, click on **Connected property** (it will show as "Connected" with a green indicator)
3. Under the Connected property section, you'll see the **Internal name** (e.g., `email` or `firstname`)
The internal name is different from the field label. For example, a field labeled "Email Address" might have an internal name of `email` or `emailaddress`. Always use the exact internal name shown in the Connected property section.
### Map Surface Form fields to HubSpot form fields
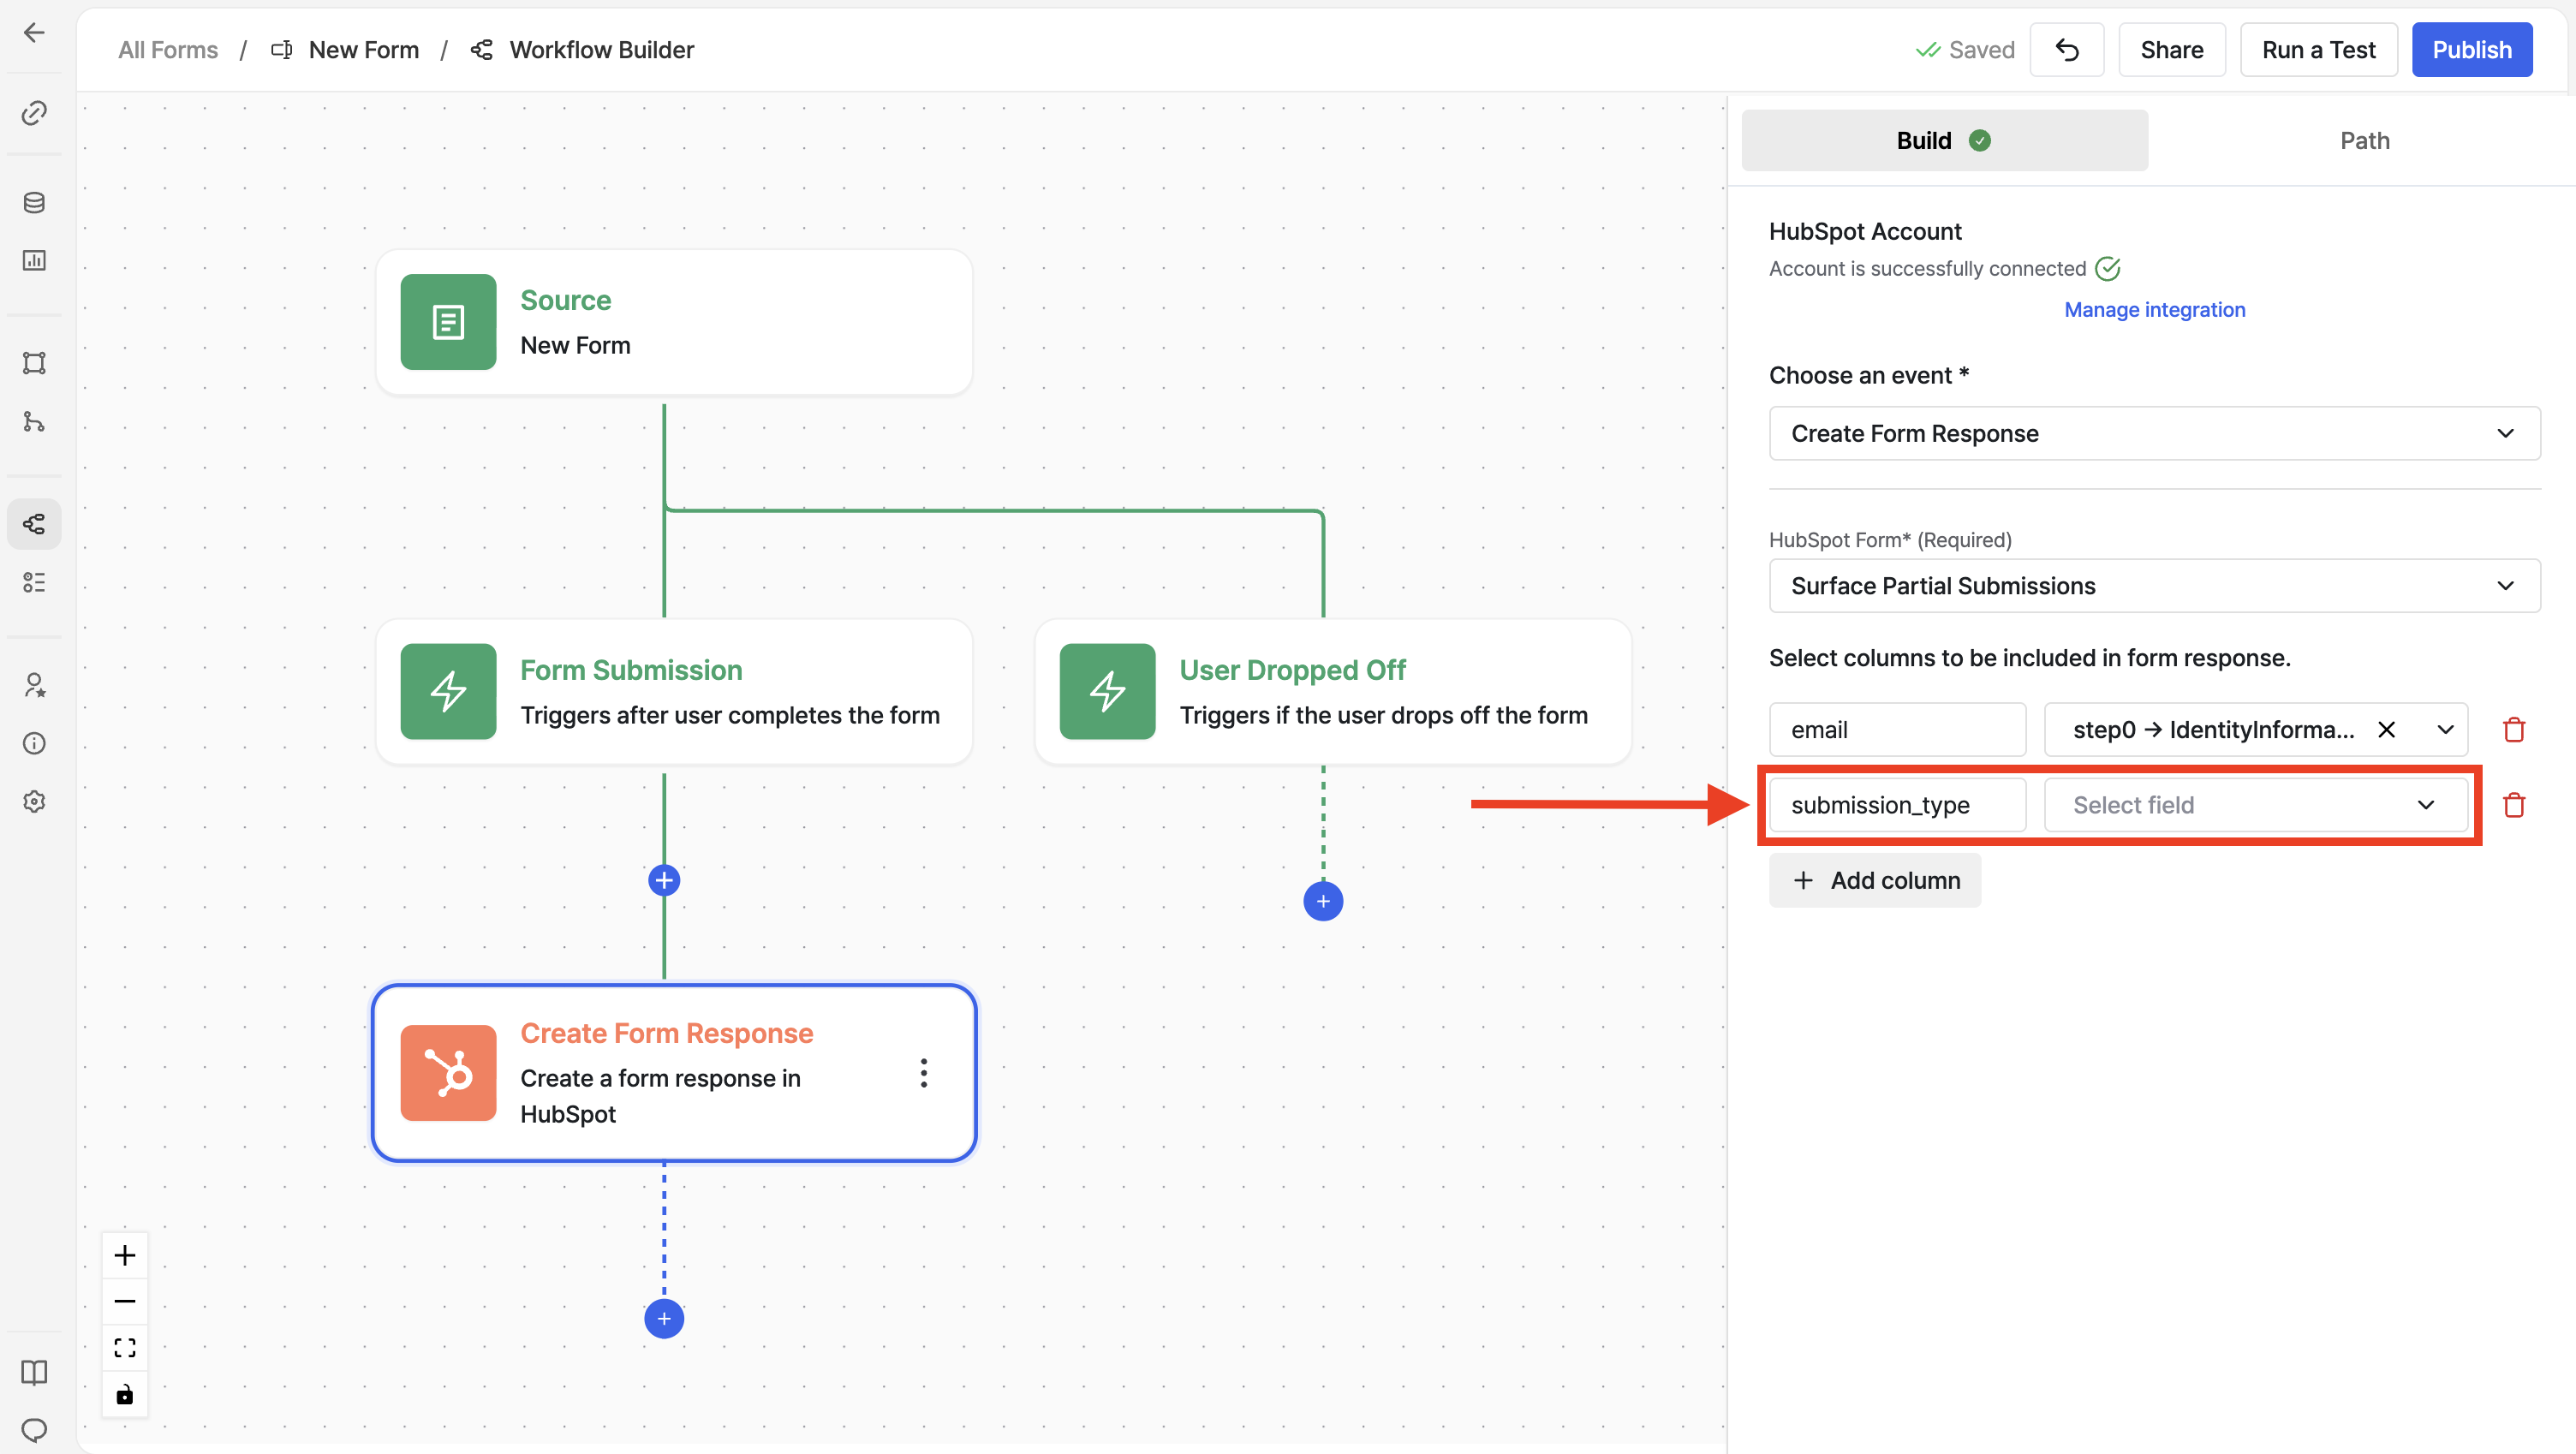 Now that you have the internal names from HubSpot, map your Surface Form fields:
1. Click on **Add column** button to add a new field mapping
2. **Key (Surface Field)**: Select the field from your Surface Form
* Example: `email` from Form Submission or Lead
* Example: `firstName` from Form Submission or Lead
3. **Value (HubSpot Internal Name)**: Enter the exact internal name you found in HubSpot
* Example: `email` (from the Email field's Connected property)
* Example: `firstname` (from the First Name field's Connected property)
4. **HubSpot Field**: Select the corresponding HubSpot form field from the dropdown
* Example: Email
* Example: First Name
**Mapping Examples:**
| Surface Field (Key) | HubSpot Internal Name (Value) | HubSpot Field |
| ---------------------------------- | ----------------------------- | ------------- |
| `email` (from Form Submission) | `email` | Email |
| `firstName` (from Form Submission) | `firstname` | First Name |
The **Value** field must match the internal name exactly as shown in HubSpot's Connected property section. This is case-sensitive—`email` is different from `Email` or `EMAIL`.
## Configure Additional HubSpot Actions (Optional)
You can add multiple HubSpot actions to your workflow:
* **Create Contact** - Create a new contact in HubSpot
* **Create or Update Contact** - Create or update a contact
* **Create Company** - Create a company record
* **Create Deal** - Create a new deal
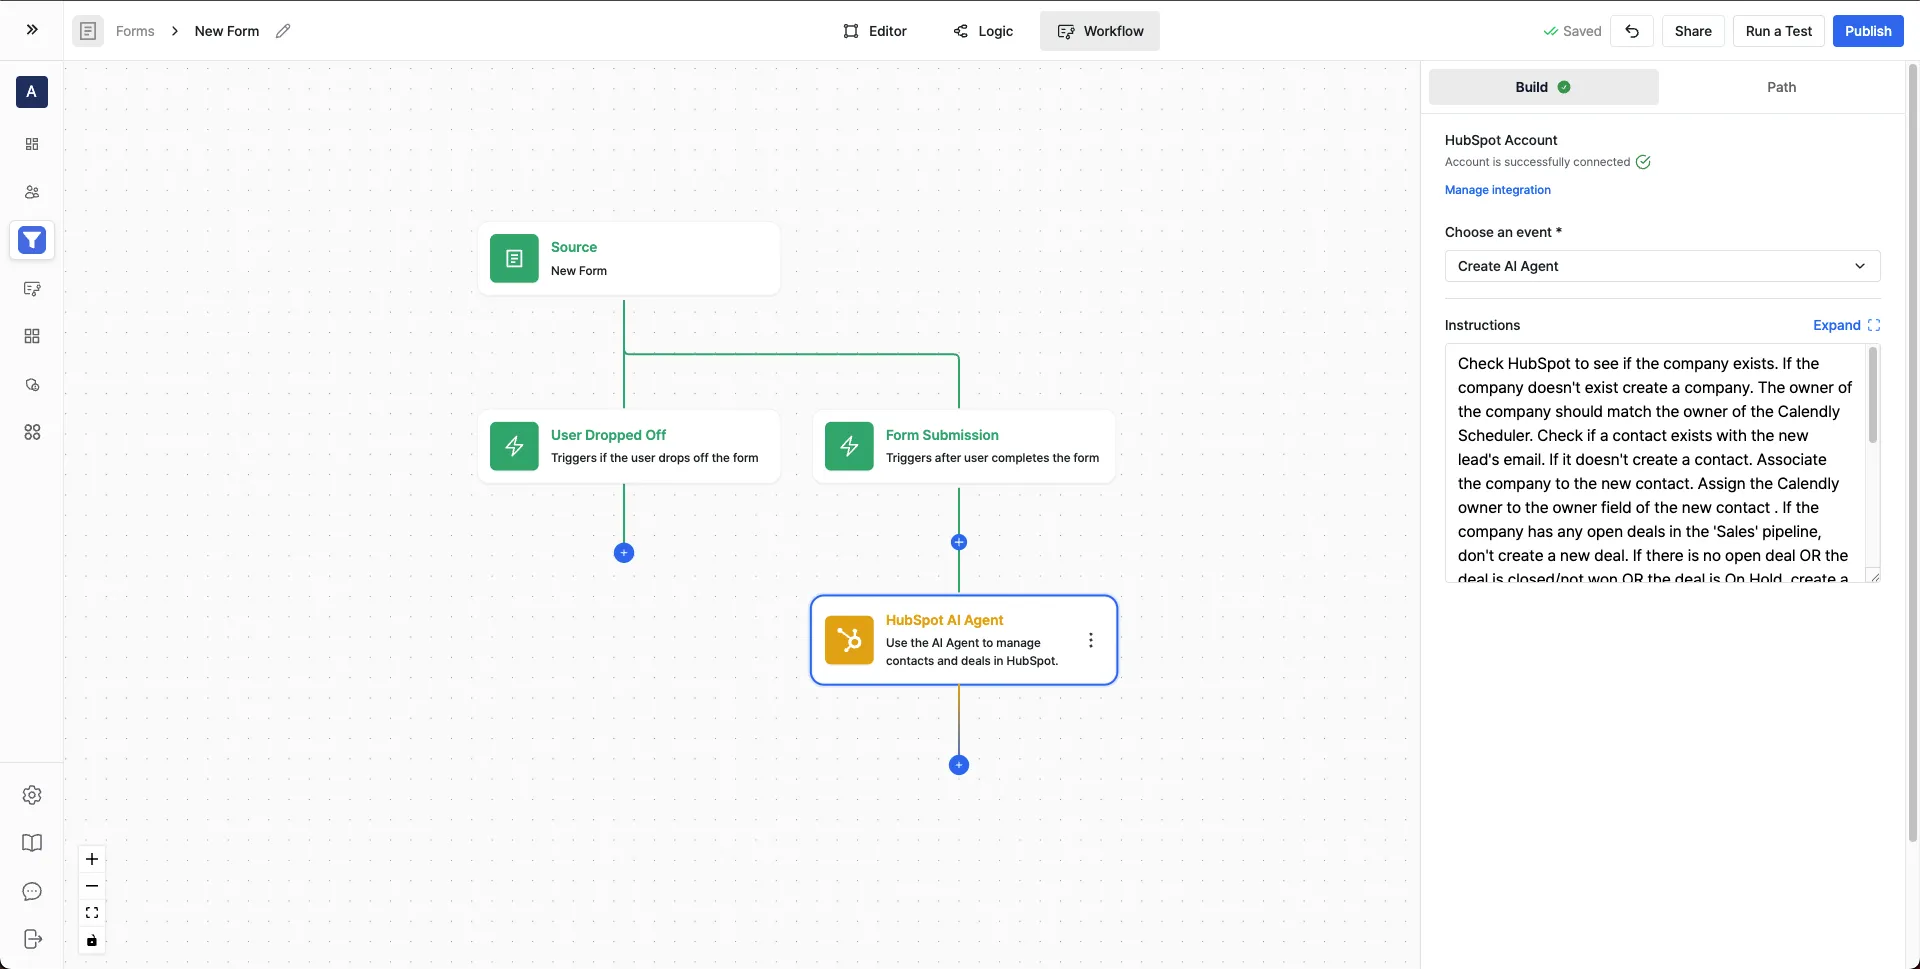
* **HubSpot AI Agent** - Use AI to manage contacts and deals automatically
Now that you have the internal names from HubSpot, map your Surface Form fields:
1. Click on **Add column** button to add a new field mapping
2. **Key (Surface Field)**: Select the field from your Surface Form
* Example: `email` from Form Submission or Lead
* Example: `firstName` from Form Submission or Lead
3. **Value (HubSpot Internal Name)**: Enter the exact internal name you found in HubSpot
* Example: `email` (from the Email field's Connected property)
* Example: `firstname` (from the First Name field's Connected property)
4. **HubSpot Field**: Select the corresponding HubSpot form field from the dropdown
* Example: Email
* Example: First Name
**Mapping Examples:**
| Surface Field (Key) | HubSpot Internal Name (Value) | HubSpot Field |
| ---------------------------------- | ----------------------------- | ------------- |
| `email` (from Form Submission) | `email` | Email |
| `firstName` (from Form Submission) | `firstname` | First Name |
The **Value** field must match the internal name exactly as shown in HubSpot's Connected property section. This is case-sensitive—`email` is different from `Email` or `EMAIL`.
## Configure Additional HubSpot Actions (Optional)
You can add multiple HubSpot actions to your workflow:
* **Create Contact** - Create a new contact in HubSpot
* **Create or Update Contact** - Create or update a contact
* **Create Company** - Create a company record
* **Create Deal** - Create a new deal
* **HubSpot AI Agent** - Use AI to manage contacts and deals automatically