> ## Documentation Index
> Fetch the complete documentation index at: https://docs.withsurface.com/llms.txt
> Use this file to discover all available pages before exploring further.
# Step 3: Add Follow-Up Emails and Delays
> Add more sequence steps with follow-up emails and business-day delays between each
In this step, you'll add **additional emails** to your HubSpot sequence and set **delays** (in business days) between each step. You can repeat this for as many follow-ups as you need.
## Add Another Step to the Sequence
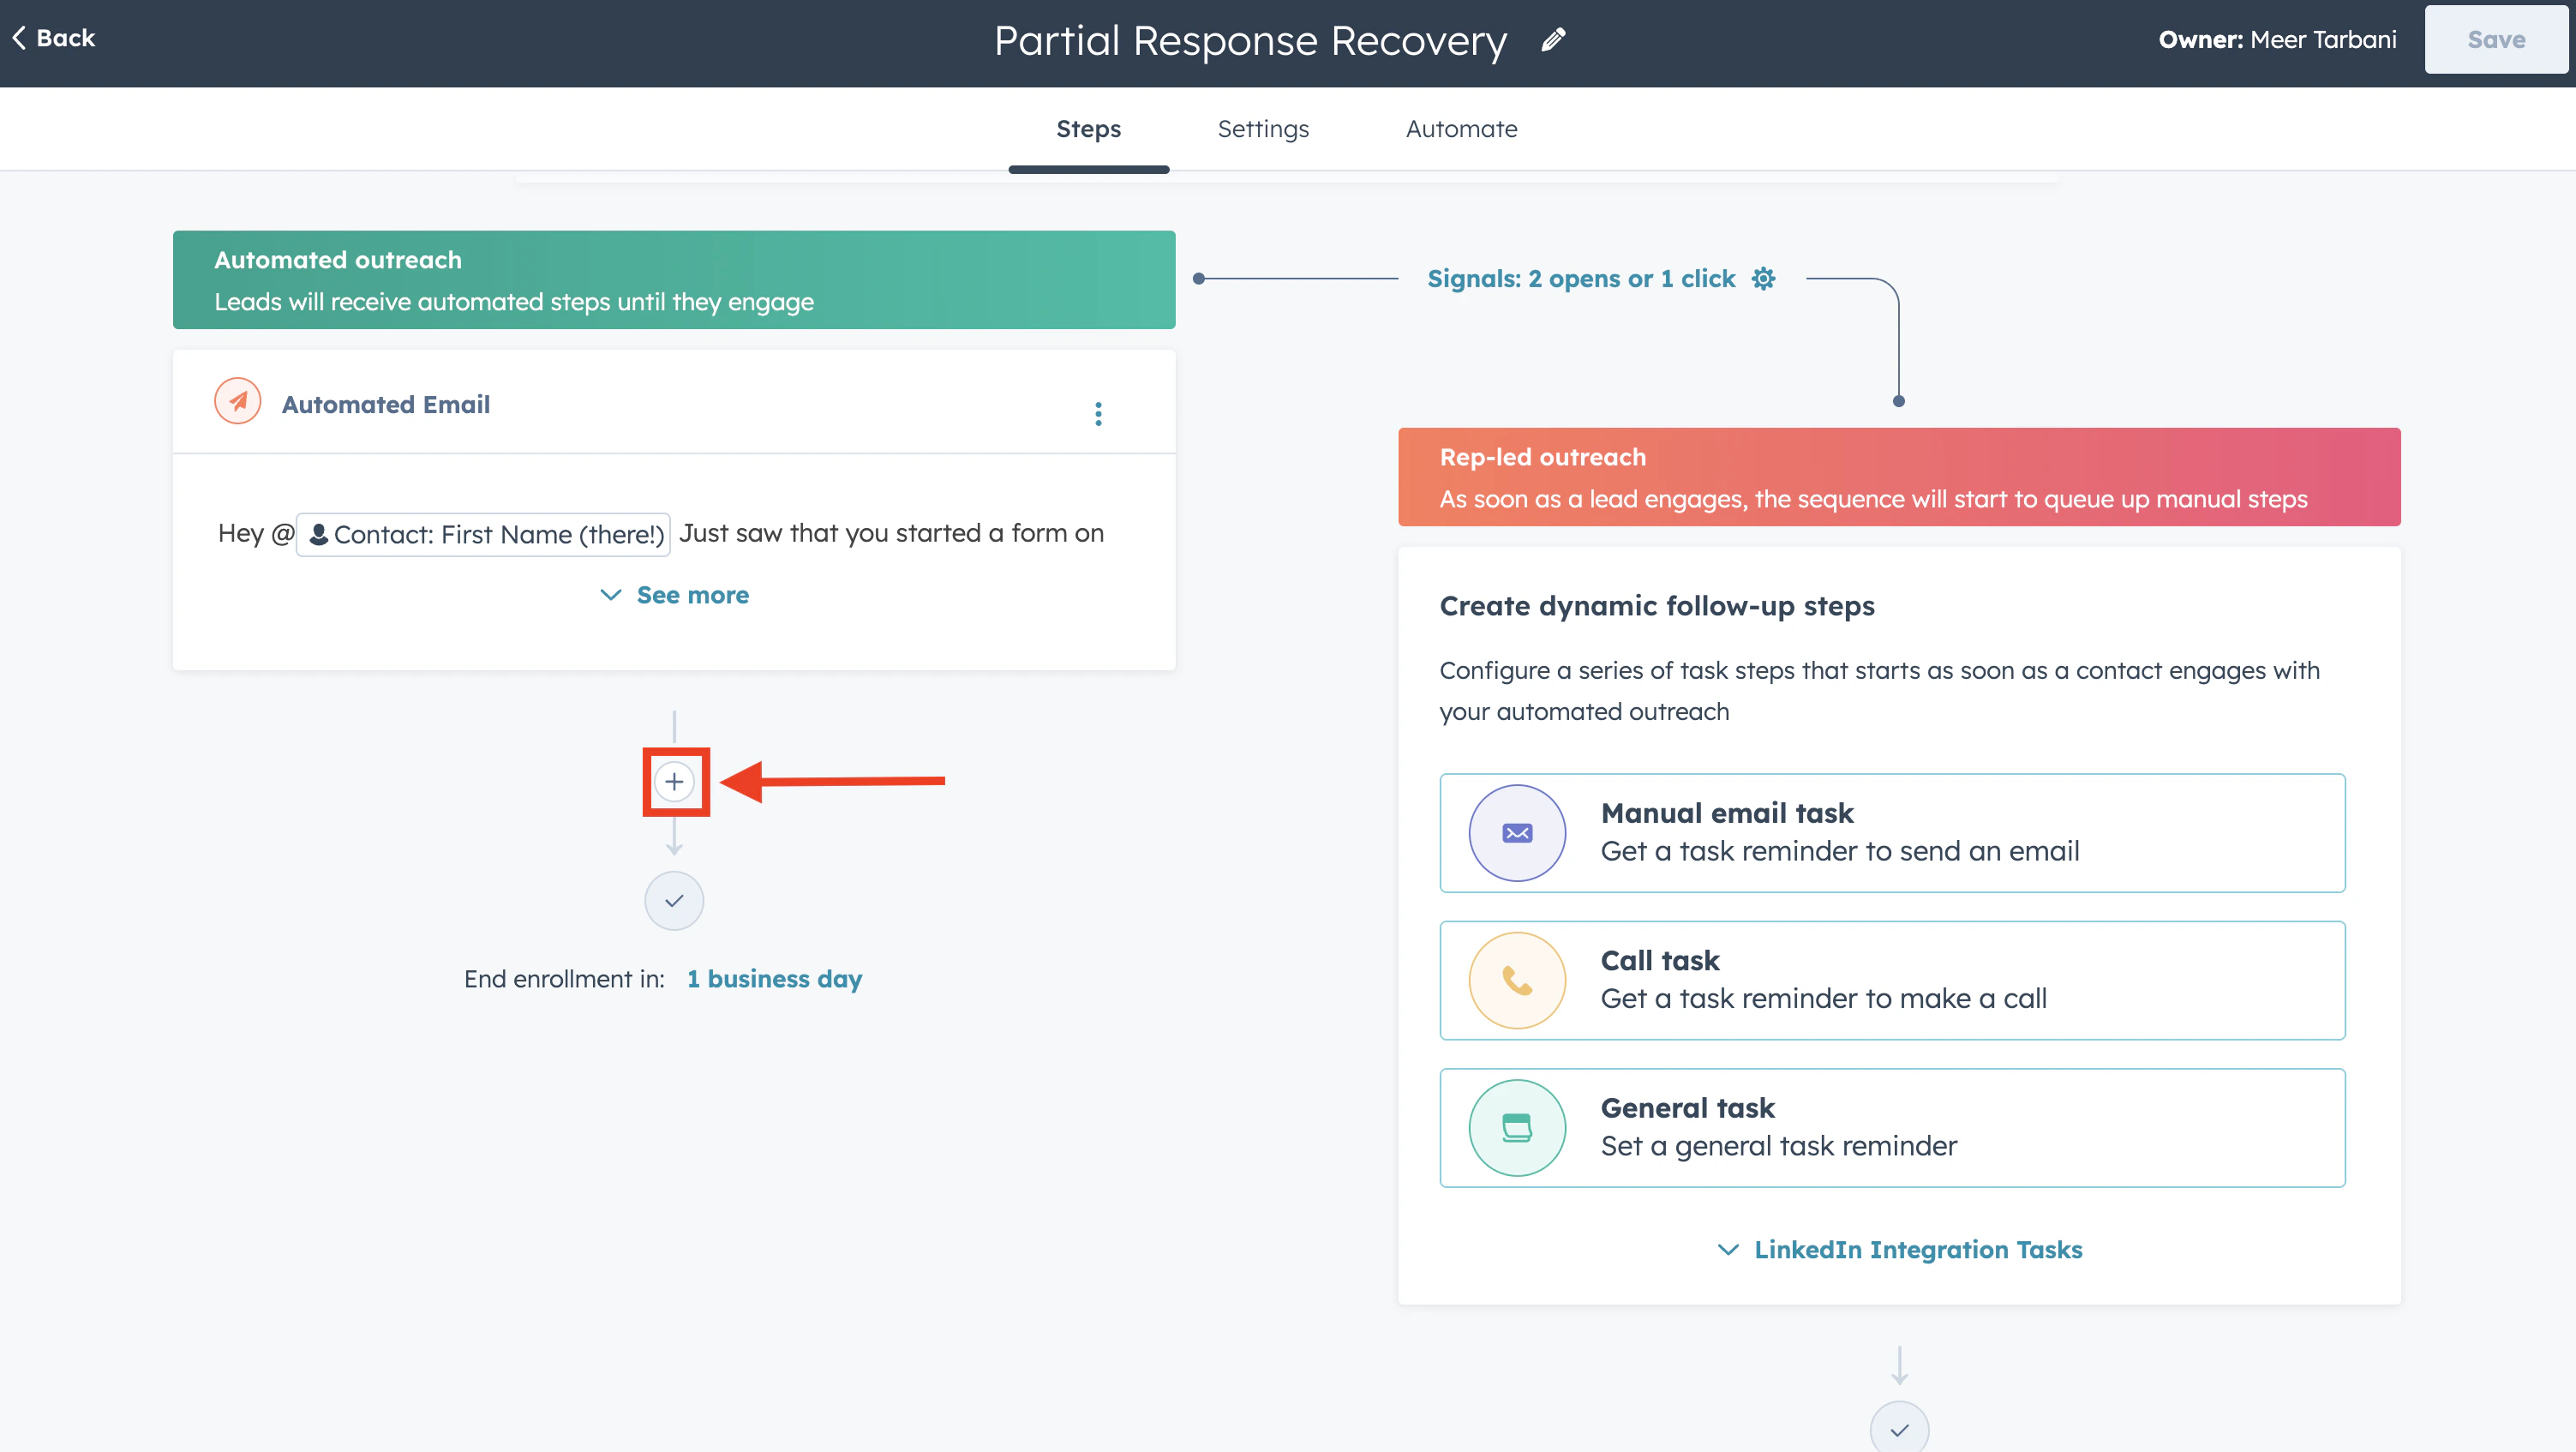 1. In your sequence, under **Steps**, click the **+** button to add a new step
2. Choose **Automated email** (or the step type you want)
## Edit the Follow-Up Email
1. In your sequence, under **Steps**, click the **+** button to add a new step
2. Choose **Automated email** (or the step type you want)
## Edit the Follow-Up Email
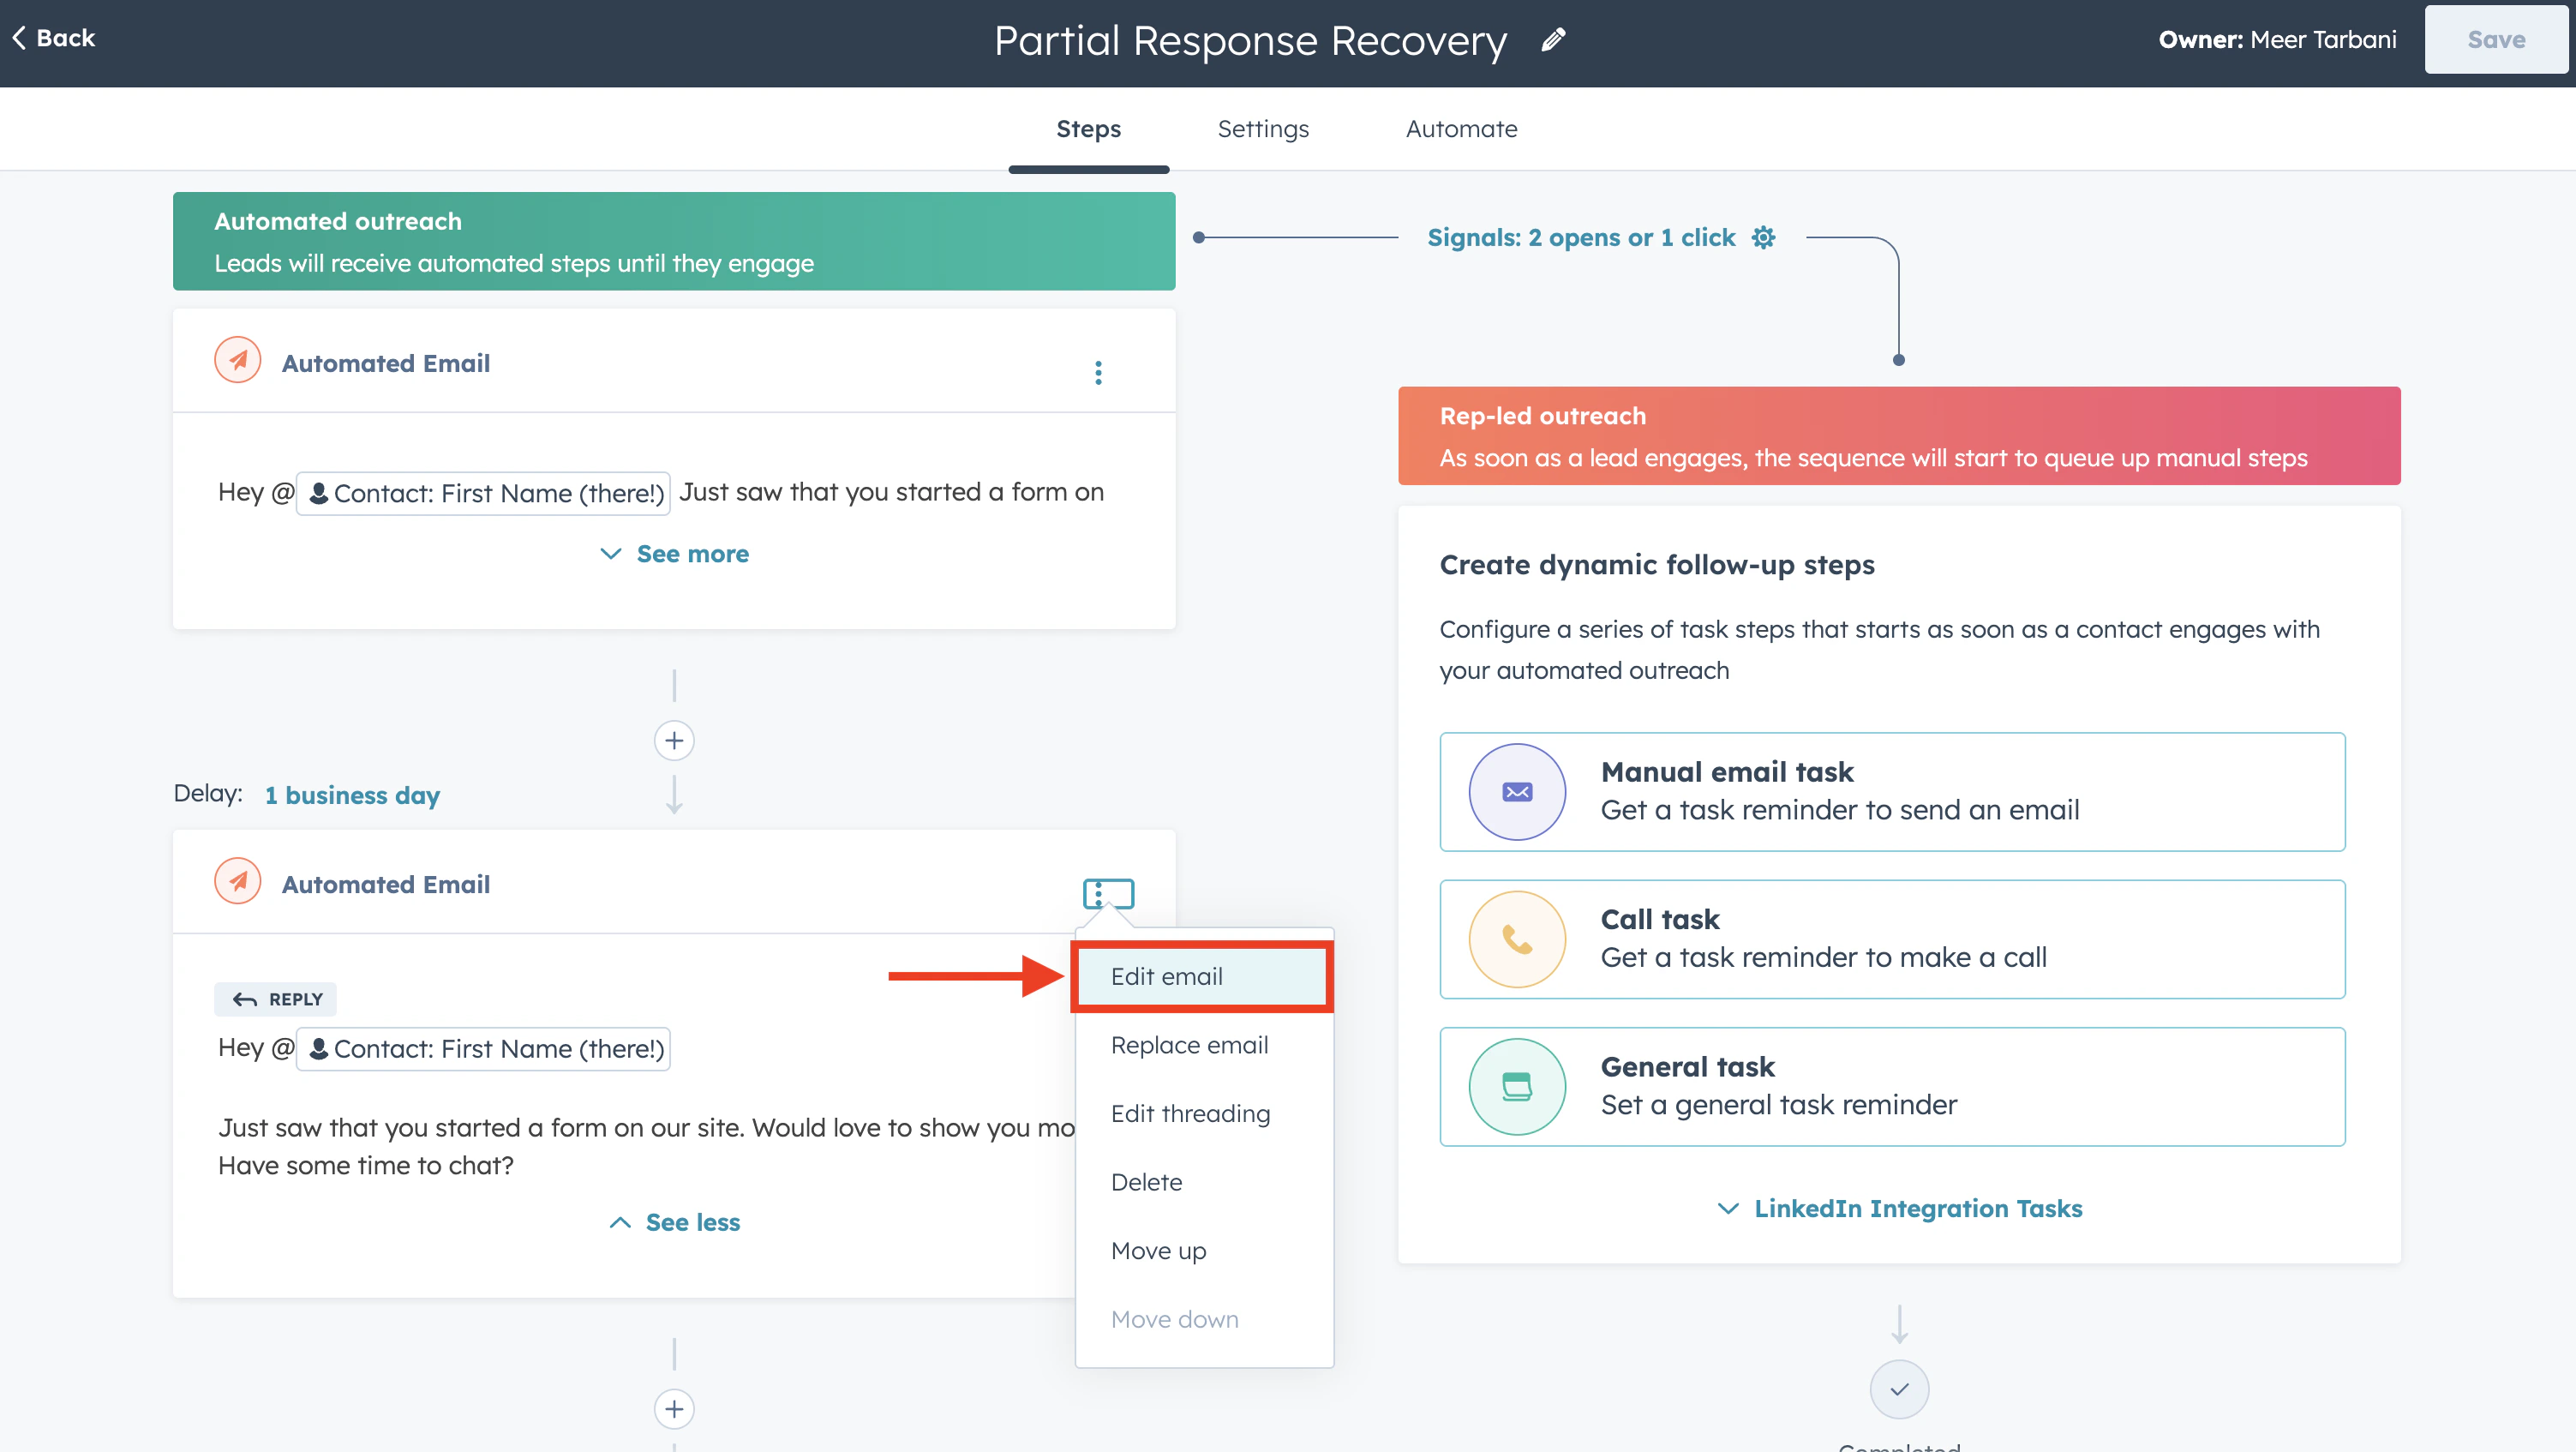 1. Click **Edit email** on the new step
2. Either **create a new template** or **use an existing one**
3. Add personalization tokens and your meeting link the same way as in [Step 2](/guides/email-sequences-hubspot/step-2-hubspot-sequence) (Insert → Personalization tokens, Insert → Meetings)
4. Save the template when done
## Set the Delay Before This Email
1. Click **Edit email** on the new step
2. Either **create a new template** or **use an existing one**
3. Add personalization tokens and your meeting link the same way as in [Step 2](/guides/email-sequences-hubspot/step-2-hubspot-sequence) (Insert → Personalization tokens, Insert → Meetings)
4. Save the template when done
## Set the Delay Before This Email
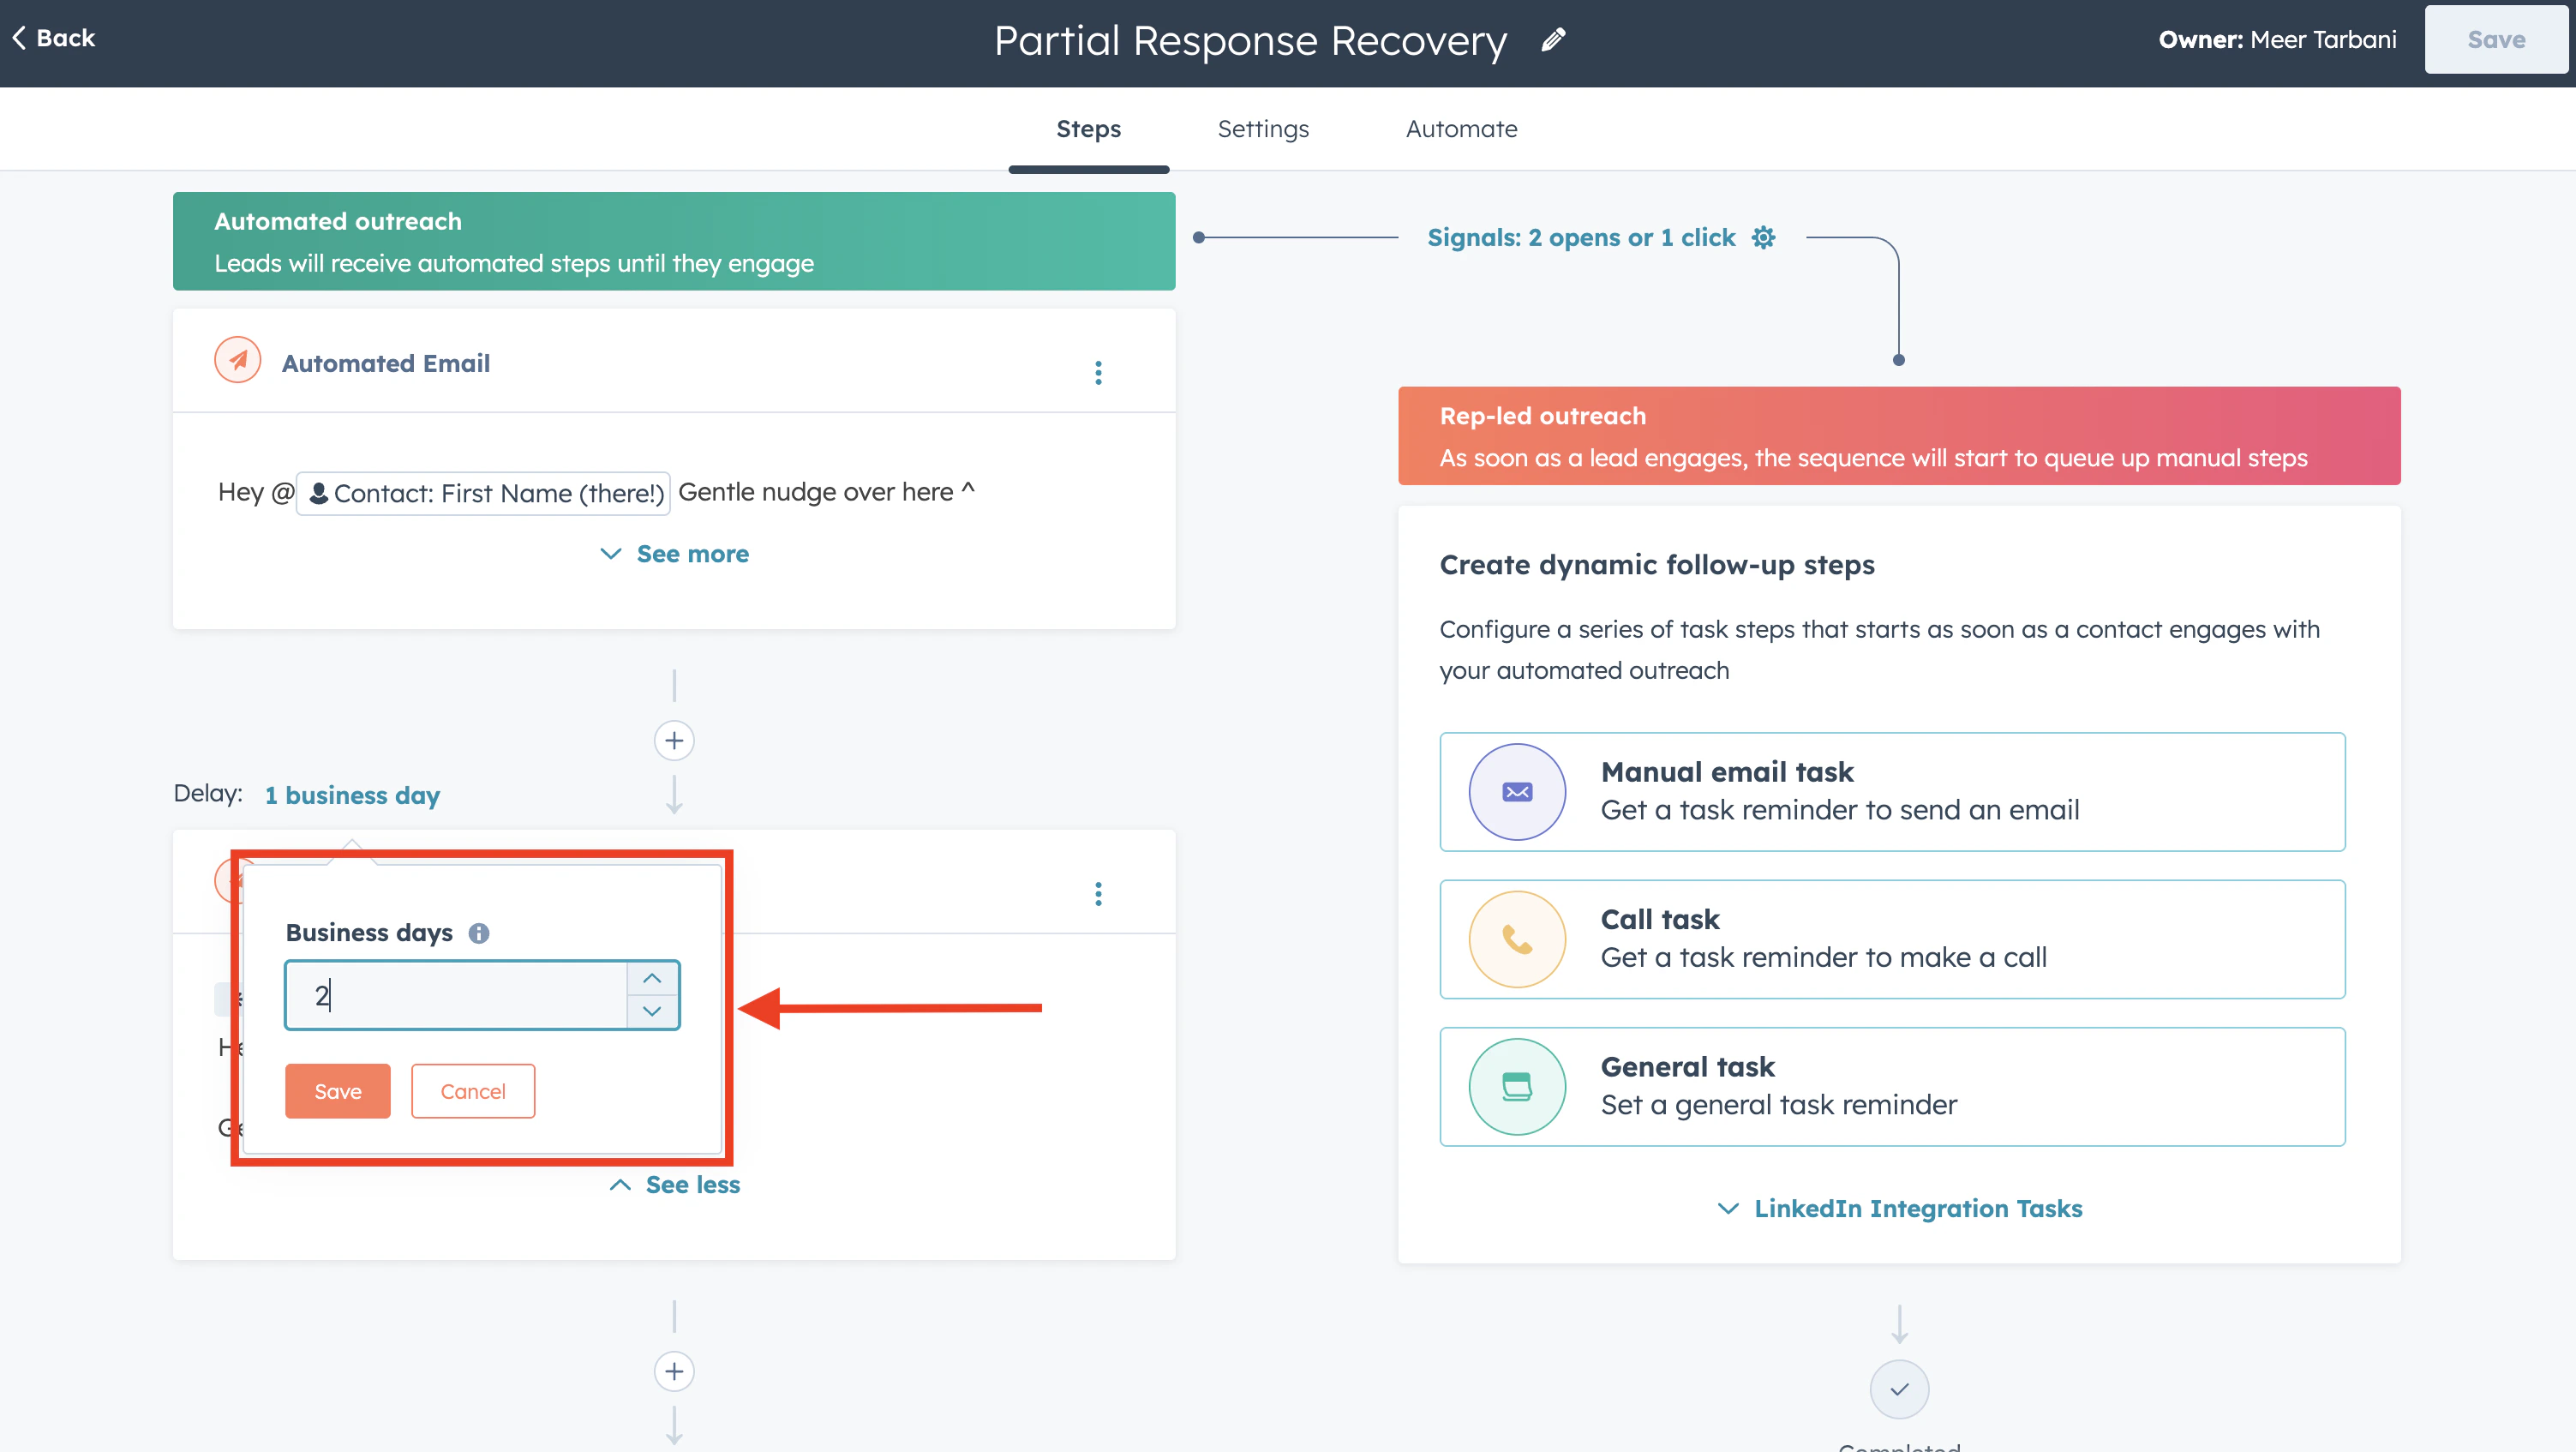 To control how many days pass before this email sends:
1. Click **Delay** on the step (or in the step settings)
2. Set the delay in **business days** (e.g., 2, 3, or 5 business days after the previous step)
3. Save
Typical patterns: 2-3 business days between the first and second email, then 3-5 for later follow-ups. Adjust based on your audience and how many touches you want.
## Repeat for More Follow-Ups
For each additional follow-up:
1. Click **+** to add another step
2. Click **Edit email** and set the content (new template or existing)
3. Click **Delay** and set the number of business days
4. Save
Your sequence might look like:
* **Step 1:** Automated email (sends immediately when enrolled)
* **Step 2:** Delay 2 business days → Automated email
* **Step 3:** Delay 3 business days → Automated email
* **Step 4:** Delay 5 business days → Automated email
* (Optional) **Step 5:** Task or other action
To control how many days pass before this email sends:
1. Click **Delay** on the step (or in the step settings)
2. Set the delay in **business days** (e.g., 2, 3, or 5 business days after the previous step)
3. Save
Typical patterns: 2-3 business days between the first and second email, then 3-5 for later follow-ups. Adjust based on your audience and how many touches you want.
## Repeat for More Follow-Ups
For each additional follow-up:
1. Click **+** to add another step
2. Click **Edit email** and set the content (new template or existing)
3. Click **Delay** and set the number of business days
4. Save
Your sequence might look like:
* **Step 1:** Automated email (sends immediately when enrolled)
* **Step 2:** Delay 2 business days → Automated email
* **Step 3:** Delay 3 business days → Automated email
* **Step 4:** Delay 5 business days → Automated email
* (Optional) **Step 5:** Task or other action